Introduction to Kunafa: A Delightful Culinary Experience
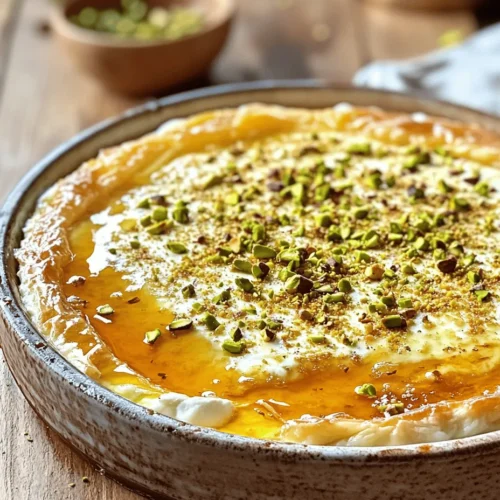
Kunafa, a delectable dessert deeply rooted in Middle Eastern culture, has captured the hearts and taste buds of many across the globe. Originating from the Levant region, this sweet pastry combines the delicate texture of thin noodle-like strands with a rich filling, typically made from cheese or nuts, and is drenched in sweet syrup. Kunafa is not just a dessert; it is a celebration of flavors, textures, and traditions, often enjoyed during festive occasions and family gatherings. Its cultural significance is immense, symbolizing hospitality and indulgence, as it is commonly served to guests as a token of warmth and generosity.
What makes kunafa truly unique is its versatility. While it is traditionally a sweet dish, the concept of blending sweet and savory flavors has given rise to innovative variations, including the Sweet and Savory Kunafa Bliss recipe. This delightful version takes the classic elements of kunafa and elevates them by introducing unexpected savory components, creating a harmonious balance of flavors that tantalizes the palate. The incorporation of savory ingredients alongside the sweet, syrup-soaked pastry creates an exciting culinary experience that delights both the adventurous eater and the traditionalist alike.
In this article, we will delve into the details of crafting Sweet and Savory Kunafa Bliss, exploring its rich history, the essential ingredients that make this dish shine, and the techniques that will ensure your creation is a resounding success. The unique blend of textures and flavors in this recipe results in a dessert that is not only visually stunning but also a joy to savor, making it an excellent addition to any dessert table.
Understanding Kunafa: A Deep Dive into Ingredients and Techniques
At the heart of any kunafa recipe lies the kunafa pastry itself. This pastry, often referred to as kataifi, consists of thin strands of dough that are delicately spun to create a light and airy texture. The unique structure of the kunafa allows it to absorb syrup while retaining its crunch, making it the perfect base for both sweet and savory fillings. The key to a successful kunafa lies in how you handle this pastry—ensuring it is evenly coated with butter to achieve that signature golden-brown crispiness.
One of the standout features of the Sweet and Savory Kunafa Bliss recipe is the combination of ricotta and mozzarella cheeses. Ricotta brings a creamy richness that complements the chewy texture of mozzarella, resulting in a filling that is both indulgent and satisfying. The quality of these cheeses is paramount; opting for fresh, high-quality products will enhance the overall flavor profile of the dish. In addition to the cheeses, the proper balance of sugar and syrup is essential, as these elements not only sweeten the pastry but also enhance the savory components, creating a well-rounded dessert experience.
For those seeking to elevate their kunafa even further, a touch of rose water can be added to the filling. This aromatic ingredient lends a floral note that beautifully complements the other flavors, adding depth and sophistication to the dessert. However, it is essential to use rose water sparingly, as its potent fragrance can easily overpower the other ingredients.
Gathering Your Ingredients: What You Need for Sweet and Savory Kunafa Bliss
Before embarking on your kunafa-making journey, it is crucial to gather all the necessary ingredients to ensure a smooth cooking process. Below is a detailed list of what you will need for the Sweet and Savory Kunafa Bliss recipe, along with potential substitutions for those who may have difficulty sourcing specific items:
Ingredients List:
1. Kunafa Pastry: 10 ounces (approximately 280 grams)
– *Substitution*: If traditional kunafa pastry is unavailable, you can use phyllo dough; however, the texture will differ slightly.
2. Unsalted Butter: 1 cup (approximately 225 grams), melted
– *Substitution*: Coconut oil can be used for a dairy-free option.
3. Ricotta Cheese: 1 cup (approximately 250 grams), drained
– *Substitution*: Mascarpone cheese can be used for a richer filling.
4. Mozzarella Cheese: 1 cup (approximately 250 grams), shredded
– *Substitution*: Queso blanco or a similar cheese can be used for a different flavor profile.
5. Granulated Sugar: 1/2 cup (approximately 100 grams) for the filling, plus additional for syrup
– *Substitution*: Brown sugar can be used for a deeper flavor.
6. Water: 1 cup (approximately 240 milliliters) for syrup
7. Lemon Juice: 2 tablespoons for syrup
– *Substitution*: Lime juice can be used for a tangy twist.
8. Rose Water: 1 teaspoon (optional) for aromatic enhancement
9. Chopped Nuts: 1/2 cup (approximately 75 grams) for garnish (e.g., pistachios or walnuts)
Sourcing Ingredients:
When sourcing your ingredients, look for authentic kunafa pastry at Middle Eastern grocery stores or specialty food markets. Fresh ricotta and mozzarella cheeses can often be found at local dairies or artisanal cheese shops. If you’re uncertain about the quality of the ingredients, consider taking the time to visit farmer’s markets or organic stores, where you can often find fresher options.
Importance of Measuring Ingredients Accurately:
Precision in measuring your ingredients cannot be overstated. Accurate measurements are crucial for achieving the perfect texture and flavor in your kunafa. Investing in a good kitchen scale and measuring cups can make a significant difference. As you prepare your ingredients, take note of their weight and volume to ensure consistency and reliability in your baking.
Step-by-Step Preparation of Sweet and Savory Kunafa Bliss
With your ingredients gathered and ready, it’s time to dive into the preparation of your Sweet and Savory Kunafa Bliss. Following a clear and methodical approach will ensure that your dessert turns out perfectly every time. Below are the initial steps to guide you through the preparation process:
Preparing the Pastry
1. Preheat Your Oven: Start by preheating your oven to 350°F (175°C). This ensures that your kunafa will bake evenly and achieve that delightful golden-brown color.
2. Handling the Kunafa Pastry: If using kunafa pastry, carefully unroll it and separate the strands. This step is crucial as it allows for even layering. If using phyllo dough, gently thaw and separate the sheets.
3. Coating with Butter: In a large mixing bowl, pour the melted unsalted butter over the kunafa strands. Using your hands or a fork, gently toss the strands to ensure they are evenly coated. This will help create a crispy texture while baking.
4. Layering the Bottom: Take half of the buttered kunafa strands and spread them evenly in the bottom of a greased baking dish, pressing down gently to create a compact base. This step is vital for ensuring the bottom layer holds together and provides a solid foundation for the filling.
Importance of Preheating the Oven
Preheating your oven is a crucial step in baking. An oven that is already at the desired temperature helps to initiate the cooking process immediately, allowing the outer layer of the kunafa to brown beautifully while keeping the inside ooey-gooey. Skipping this step can result in uneven cooking and a less desirable texture.
Layering the Filling
Once you have laid down the first half of the kunafa strands, it’s time to add the savory and sweet filling. Spread the ricotta mixture evenly over the base, followed by the shredded mozzarella. The combination of these cheeses will melt together beautifully, creating a creamy and indulgent center. Finally, top the filling with the remaining kunafa strands, ensuring an even layer on top.
As you prepare to bake your Sweet and Savory Kunafa Bliss, keep in mind that the layering technique is essential for achieving the perfect balance of flavors and textures. The bottom layer should be compact enough to hold the filling while allowing the top to crisp up perfectly during baking.
With the preparation steps outlined, you are well on your way to crafting a stunning Sweet and Savory Kunafa Bliss that will impress your family and friends. The combination of sweet and savory elements, alongside the rich history of kunafa, makes this dessert a true culinary masterpiece. Stay tuned for the next part of this article, where we will explore the baking process, syrup preparation, and final touches that will elevate your kunafa to new heights.
Sweet and Savory Kunafa Bliss: Mastering the Art of Texture and Flavor
When it comes to desserts, texture plays an immensely significant role in elevating the overall experience. The delicate layers of kunafa juxtaposed with the creamy cheese filling create a contrast that is both delightful and satisfying. This unique texture is what makes kunafa so special, and understanding how to achieve it can elevate your dessert from good to unforgettable.
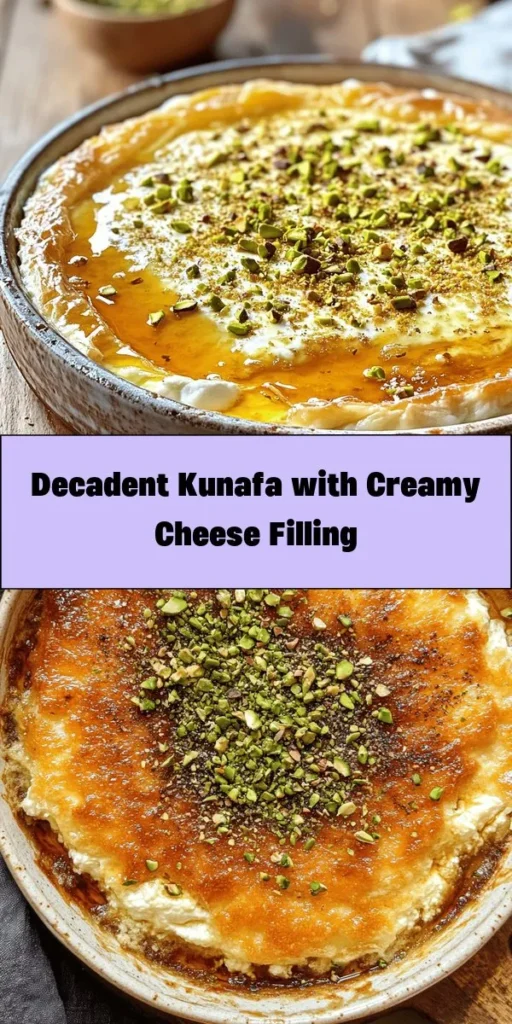
Crafting the Cheese Filling: Achieving the Perfect Creamy Consistency
The heart of any good kunafa lies in its cheese filling. To achieve the ideal creamy consistency, it’s essential to select the right combination of cheeses. Traditionally, a blend of mozzarella and a soft, creamy cheese like ricotta or even cream cheese can work wonders. The mozzarella provides that wonderful stretchiness, while the softer cheese adds a rich, creamy mouthfeel.
To prepare your cheese filling, start by grating or shredding your mozzarella, and then combine it with the softer cheese in a mixing bowl. For added flavor, consider incorporating a splash of rose water or orange blossom water. These floral notes will elevate the cheese filling and add an aromatic quality that complements the sweetness of the kunafa.
Combining Different Cheeses for Flavor Depth
Experimenting with different cheeses can also enhance the flavor depth of your kunafa. For example, adding a small amount of ricotta can provide an extra layer of creaminess, while a sprinkle of feta can introduce a subtle tanginess that balances the sweetness of the syrup. It’s important to taste your filling before layering it into the kunafa to ensure that the flavors are harmonious.
Once your cheese mixture is ready, set it aside as you prepare the kunafa pastry. This filling is the secret to achieving that sweet and savory bliss that makes this dessert so beloved.
Topping with Pastry: Techniques for Layering and Stability
Layering the kunafa pastry is where the magic truly begins. For the best results, ensure that your kunafa strands are evenly distributed and well-buttered. Start by taking a handful of the pastry and spreading it evenly across the bottom of your baking dish. Press it down gently to create a stable base.
Next, spoon a generous layer of the cheese filling over the base, ensuring it reaches the edges for even distribution. Follow this with another layer of kunafa strands, using the same technique as before. It’s crucial to repeat this layering process until all your filling is encased between layers of kunafa. This not only ensures stability during baking but also helps the dessert hold its shape when sliced.
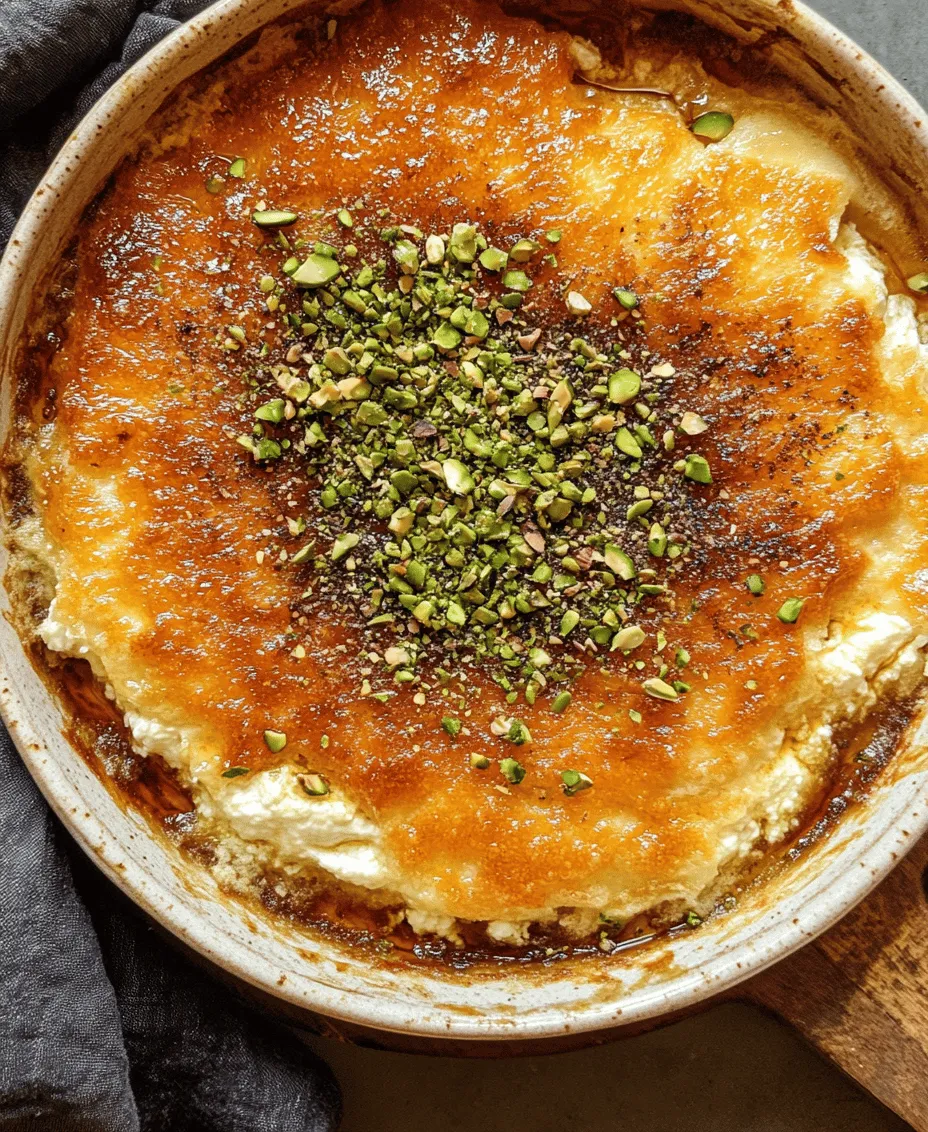
Baking to Perfection: Signs to Look for to Determine Doneness
Baking kunafa to perfection is an art that requires attention to detail. Preheat your oven to 350°F (175°C) and place the assembled kunafa in the oven for about 30 to 40 minutes. Keep a close eye on it as it bakes. The top should turn a beautiful golden brown, and the edges will start to crisp up.
A true sign of doneness is when you can smell the nutty aroma of the toasted kunafa wafting through your kitchen. You may also want to use a toothpick or a knife to check the center—if it comes out clean, your kunafa is ready to be removed from the oven. Understanding the science behind baking kunafa ensures that you achieve that ideal, crispy exterior while the interior remains soft and gooey.
Creating the Sweet Syrup: A Key Component of Kunafa Bliss
No kunafa is complete without its signature sweet syrup. The syrup is what ties the entire dish together, enhancing the flavors and providing that signature sweetness that makes kunafa irresistible.
Recipe for the Sugar Syrup: Balancing Sweetness and Flavor
To make the syrup, combine 1 cup of sugar with 1 cup of water in a saucepan. Bring the mixture to a gentle boil, stirring occasionally until the sugar dissolves completely. Once boiling, add a squeeze of lemon juice to prevent crystallization and enhance the flavor. For a fragrant touch, consider adding a few cardamom pods or a splash of vanilla extract. Allow the syrup to simmer for about 10 minutes until it thickens slightly.
The Cooling Process: Why It’s Essential Before Drizzling on the Kunafa
Once your syrup is ready, it’s essential to cool it down to room temperature before drizzling it over the hot kunafa. Pouring hot syrup over hot kunafa can make it too soggy, while warm syrup will soak in just the right amount to create that perfect balance of moistness without compromising the crispy texture.
Discussing Variations of Syrup: Honey vs. Sugar Syrup and Their Flavor Profiles
While sugar syrup is the traditional choice, experimenting with honey can introduce a different flavor profile. Honey syrup tends to be richer and has a distinct floral sweetness that can complement the kunafa beautifully. To make honey syrup, simply use the same method as above, replacing sugar with honey and adjusting the water accordingly to achieve your desired consistency.
Garnishing and Serving Suggestions for Maximum Enjoyment
Presentation is key when it comes to desserts. A beautifully garnished kunafa can make a simple dessert feel like a special occasion.
Importance of Presentation in Enhancing the Dessert Experience
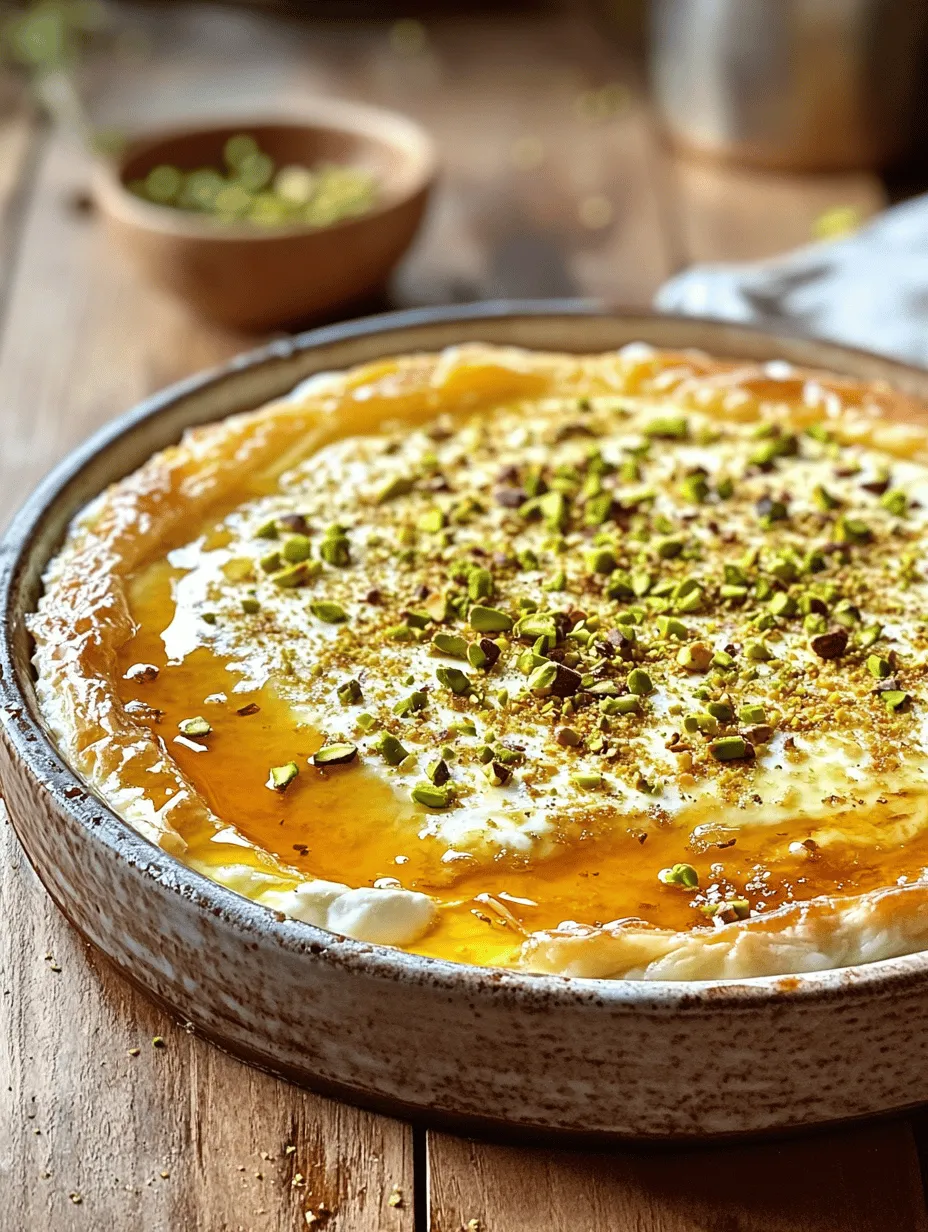
To enhance the visual appeal of your kunafa, consider garnishing it with a generous sprinkle of crushed pistachios or walnuts. Not only does this add a pop of color, but it also contributes a delightful crunch that contrasts with the soft layers of kunafa and cheese.
Suggestions for Garnishing with Pistachios and Additional Syrup
After drizzling the cooled syrup over the baked kunafa, follow up with a scattering of finely chopped nuts. You can also add a dusting of powdered sugar for an extra touch of sweetness and elegance. For those who enjoy a bit of spice, a light sprinkle of cinnamon can be a wonderful addition as well.
Serving Temperature and Pairing Ideas for a Delightful Dessert Experience
Kunafa is best served warm, allowing the creamy filling to be at its most luscious. Pair it with a dollop of whipped cream or a scoop of vanilla ice cream to amplify the indulgence. A cup of Arabic coffee or a glass of mint tea complements the dessert beautifully, balancing the sweetness with a refreshing note.
Conclusion: Savoring the Sweet and Savory Kunafa Bliss
In summary, the sweet and savory kunafa bliss is a labor of love that rewards you with a dessert that is both visually stunning and incredibly delicious. The perfect balance of textures—from the crispy layers of kunafa to the gooey cheese filling—combined with the aromatic sweet syrup creates an unforgettable experience.
Exploring the versatility of kunafa allows you to experiment with flavors and fillings, making it a delightful dish suitable for various culinary contexts. Beyond a simple dessert, kunafa carries cultural significance, often shared during special occasions and gatherings with friends and family.
By mastering the art of kunafa, you not only create a delicious treat but also embrace a tradition that celebrates togetherness and joy. So gather your ingredients, follow these detailed steps, and indulge in the sweet and savory bliss of kunafa—because every bite is a moment worth savoring.