
Introduction
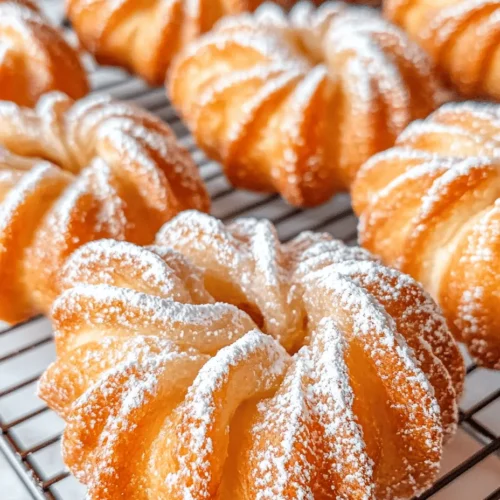
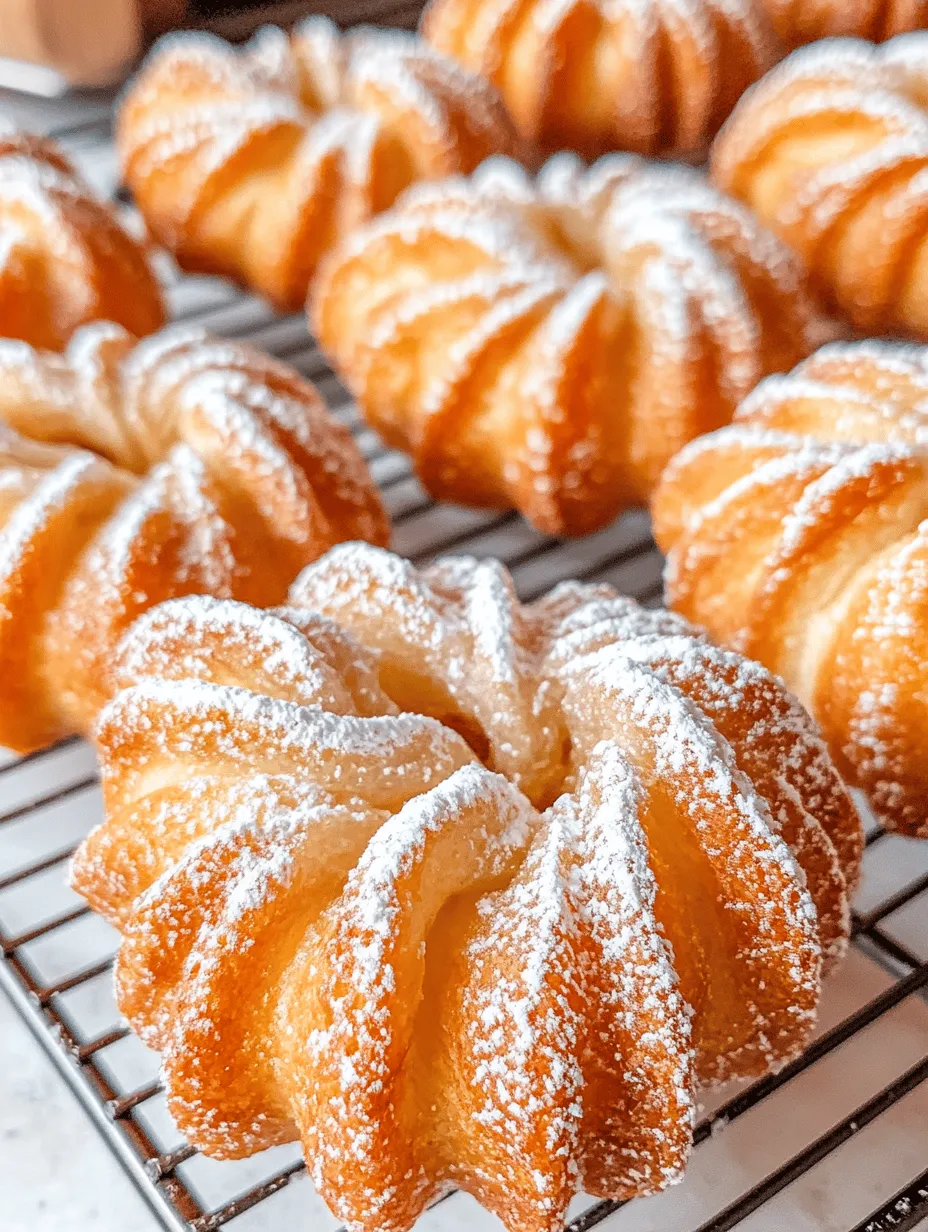
If you’re a fan of pastries, then French crullers may just hold a special place in your heart. These delicate, ring-shaped delights are not only visually appealing but also offer a unique combination of textures and flavors that make them irresistible. Originating from the rich traditions of French patisserie, crullers are light, airy, and slightly crisp on the outside, with a soft, tender interior that practically melts in your mouth. Their delightful sweetness, often enhanced by a glaze, makes them an ideal treat for any occasion, from brunch gatherings to festive celebrations.
The cultural significance of crullers extends beyond their deliciousness; they represent a part of France’s culinary heritage that has been cherished for generations. Traditionally enjoyed during special occasions, these pastries have evolved over time, becoming a beloved staple in bakeries around the world. The history of crullers traces back to the early days of French cuisine, where they were crafted to showcase the skill and artistry of the pastry chef. Each bite tells a story of craftsmanship and culinary excellence, making homemade crullers a wonderful way to connect with this heritage.
When you take a bite of a freshly made French cruller, you experience an explosion of flavors and textures. The outer layer has a subtle crunch, giving way to a fluffy interior that is infused with hints of vanilla and almond. The sweet glaze, often made with powdered sugar and milk, adds a luscious finish that elevates the overall experience. Whether enjoyed with a cup of coffee or as a standalone treat, crullers are sure to delight your taste buds.
Making French crullers at home not only allows you to appreciate the art of pastry-making but also gives you the satisfaction of creating something special for yourself and your loved ones. Whether it’s a birthday celebration, a weekend brunch, or simply a craving for something sweet, these homemade crullers are a delightful way to treat yourself. Let’s dive deeper into the world of French crullers, exploring their unique characteristics and how to replicate this classic recipe in your kitchen.
Understanding French Crullers
So, what exactly are French crullers? At their core, crullers are a type of choux pastry that is piped into a twisted, ring shape and then deep-fried to golden perfection. Unlike traditional doughnuts, which are typically made with a yeast-based dough, crullers rely on the steam created from the moisture in the dough during frying to achieve their airy texture. This unique method of preparation results in a pastry that is light as air, distinguishing it from denser alternatives like doughnuts and beignets.
When comparing crullers to other pastries, the differences are quite pronounced. Doughnuts are often leavened with yeast, resulting in a chewy texture that can be quite satisfying. Beignets, on the other hand, are made from a richer dough that is typically fried until crispy on the outside and soft on the inside. Crullers, however, stand out due to their choux pastry base, which creates a unique lightness that is hard to replicate. The use of eggs in the batter contributes to their fluffiness, while the fried exterior provides a slight crunch that contrasts beautifully with the tender inside.
The flavor profile of French crullers is equally distinctive. While they are mildly sweet, the addition of vanilla and almond extracts offers a nuanced richness that sets them apart. The glaze, often made from powdered sugar and milk, adds a delightful sweetness that complements the pastry without overpowering it. This balance of flavors, combined with the luxurious texture, makes crullers a favorite among pastry enthusiasts.
Ingredients Breakdown
Creating the perfect French crullers requires a precise selection of ingredients, each playing a vital role in achieving the desired flavor and texture. Let’s take a closer look at what you’ll need to make these delightful pastries:
1. Water: Water is essential in this recipe as it creates steam during the frying process. This steam is what helps the crullers rise and develop their airy structure.
2. Unsalted Butter: The use of unsalted butter adds richness and flavor to the crullers. It also aids in creating a tender crumb, ensuring that the pastries are soft and delightful.
3. Salt: While it may seem counterintuitive to add salt to sweet pastries, a small amount enhances the overall flavor, balancing the sweetness and elevating the taste profile.
4. All-Purpose Flour: Flour is the backbone of the cruller dough. It provides structure and stability, ensuring that the pastries hold their shape while frying.
5. Eggs: Eggs are crucial in this recipe, contributing to both leavening and richness. They help the crullers rise and create that desirable light texture.
6. Vanilla and Almond Extracts: These extracts provide aromatic notes that elevate the flavor of the crullers. The combination of vanilla and almond creates a warm, inviting taste that complements the sweetness.
7. Powdered Sugar and Milk: These ingredients are used to create the glaze that coats the crullers. The powdered sugar adds sweetness, while the milk helps achieve the perfect consistency for drizzling.
8. Oil: The choice of oil is important for frying. It should have a high smoke point, allowing the crullers to fry evenly without absorbing excess oil.
Step-by-Step Instructions for Making French Crullers
Now that we’ve covered the ingredients, it’s time to delve into the detailed steps for making French crullers. The process may seem intimidating at first, but with careful attention to each step, you’ll be rewarded with delicious pastries that impress.
Preparing the Dough
1. Start by combining the water, unsalted butter, and salt in a medium saucepan. Place the saucepan over medium heat and bring the mixture to a gentle boil. The goal is to melt the butter completely while allowing the water to reach a slight simmer.
2. Once the butter has melted, reduce the heat to low and gradually add in the all-purpose flour. Stir continuously with a wooden spoon or spatula until the mixture forms a cohesive ball that pulls away from the sides of the pan. This process typically takes about 1-2 minutes.
3. Remove the saucepan from the heat and let the dough cool for a few minutes. This cooling period is essential, as it prevents the eggs from cooking too quickly when added in the next step.
4. In a separate bowl, crack in the eggs and lightly beat them. Once the dough has cooled slightly, gradually incorporate the beaten eggs into the mixture, one at a time. Stir well after each addition until fully incorporated. The dough will become smooth and glossy as you mix.
5. Add the vanilla and almond extracts to the dough, stirring until evenly distributed. This will infuse the dough with a delightful aroma and flavor.
6. Prepare your piping bag by fitting it with a large star tip. Transfer the dough into the piping bag, ensuring there are no air bubbles trapped inside. This will help create the beautiful ridged design characteristic of crullers when they are piped.
Incorporating the Flour
7. Heat the oil in a deep fryer or a heavy-bottomed pot to 350°F (175°C). It’s important to maintain this temperature to ensure even cooking and avoid greasy crullers.
8. Begin piping the dough into the hot oil. Start from the center of the oil and move outward in a circular motion to create a ring shape. You can pipe multiple crullers at once, but be sure not to overcrowd the pot, as this can lower the oil temperature.
9. Fry the crullers for about 3-4 minutes on each side or until they turn a beautiful golden brown. Use a slotted spoon to carefully flip them halfway through cooking to ensure even browning.
10. Once cooked, remove the crullers from the oil and place them on a paper towel-lined plate to drain excess oil.
With these initial steps, you’re well on your way to creating your very own French crullers. The combination of techniques and ingredients will result in a pastry that is not only delightful to eat but also a joy to make. As you progress through the recipe, you’ll find that the process becomes increasingly rewarding, culminating in a batch of delicious crullers that are sure to impress. Stay tuned for the next part, where we’ll dive into the glazing process and finish these delightful treats!
Cooling and Adding Eggs: Tips for Achieving the Right Consistency
Once your dough has been cooked through on the stovetop and cooled down to a manageable temperature, you’ll need to incorporate the eggs. This step is crucial, as adding eggs while the dough is still too hot can cause them to scramble, resulting in an undesirable texture.
To achieve the right consistency, allow the dough to cool for about 5-10 minutes before adding the eggs. The dough should still be warm but not steaming. When you add the eggs, do so one at a time, mixing thoroughly between each addition. This gradual incorporation helps ensure that the mixture becomes smooth and elastic. You can use a wooden spoon or a stand mixer fitted with a paddle attachment for this task. The end result should be a glossy, thick batter that holds its shape when piped.
Flavoring the Dough with Extracts: Achieving the Perfect Balance of Flavors
Flavoring your crullers is an opportunity to elevate them beyond the classic recipe. While traditional crullers are delicious on their own, adding extracts can enhance their flavor profile. Vanilla extract is a popular choice, providing a warm and sweet undertone that complements the pastry’s richness.
For a more adventurous twist, consider adding almond extract or citrus zest (like lemon or orange) to the dough. Start with half a teaspoon of extract and adjust to taste, remembering that the flavors will intensify as the crullers fry. By carefully balancing these flavors, you’ll create a delightful taste experience that makes your crullers truly unique.
Piping the Crullers: Techniques for Shaping and Ensuring Uniformity
Piping the crullers is where you can get creative while also ensuring uniformity in size and shape. Using a large star piping tip (like a Wilton 1M) will help you achieve the signature ridged design of a cruller.
Begin by filling a piping bag with your dough, ensuring there are no air bubbles. To pipe, hold the bag perpendicular to the frying surface and squeeze gently, allowing the dough to flow out. For traditional shapes, pipe a ring about 3 inches in diameter, making sure to connect the ends in the center. This will help the cruller maintain its shape while frying.
If you’re concerned about uniformity, practice piping on parchment paper before moving to the frying oil. This practice run can help you gauge the size and shape of your crullers. Remember, the more consistent the size, the more evenly they will fry.
Frying: Best Practices for Achieving the Ideal Golden Brown Color
Frying your crullers requires attention to temperature and timing. The ideal oil temperature for frying crullers is between 350°F to 375°F (175°C to 190°C). If the oil is too hot, the outside will brown too quickly while the inside remains raw; if it’s too cool, the crullers will absorb excess oil and become greasy.
To maintain the perfect frying temperature, use a deep-fry thermometer. Once the oil reaches the desired temperature, gently lower your piped crullers into the oil, taking care not to overcrowd the pan, as this can lower the temperature of the oil. Fry them for about 4-5 minutes on each side, or until they achieve a beautiful golden brown color.
Draining Excess Oil: Ensuring Crullers Are Not Greasy
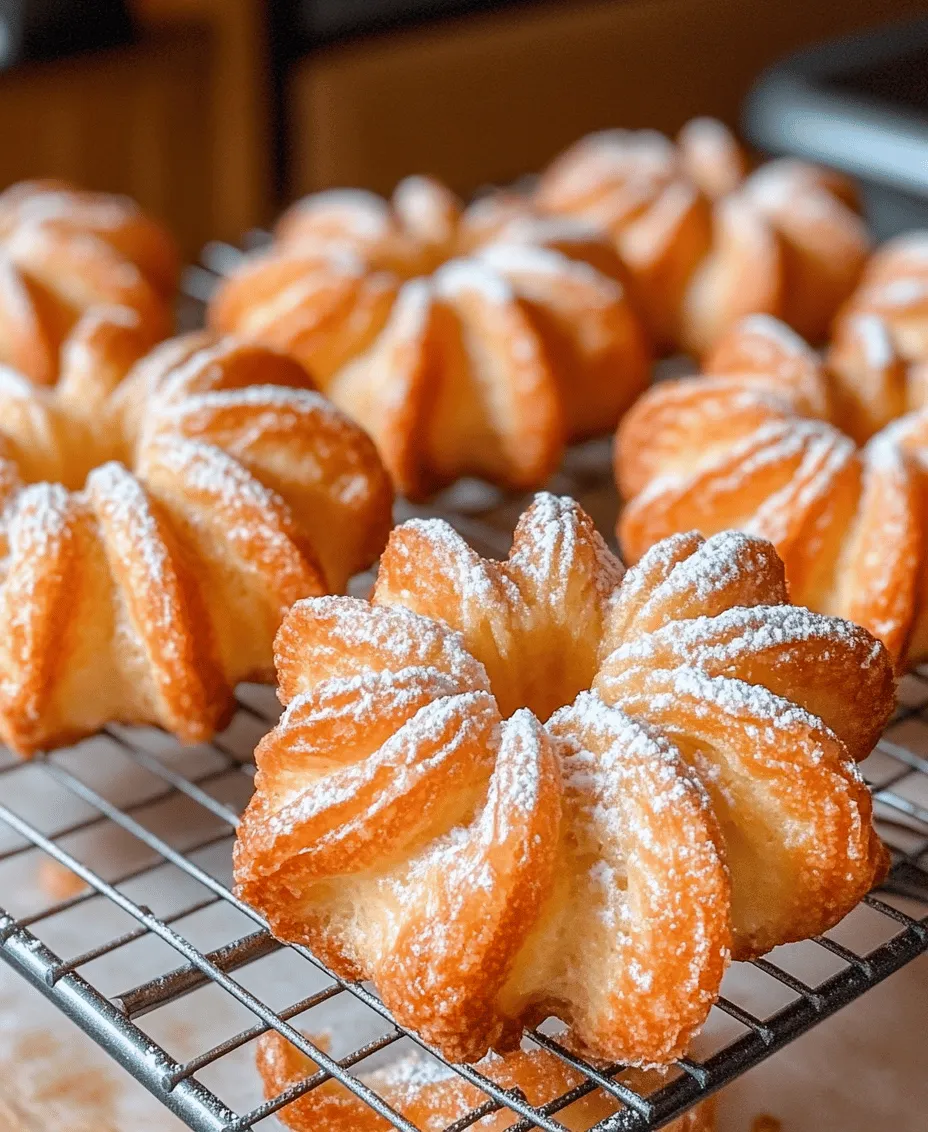
After frying, it’s essential to drain the excess oil from your crullers to ensure they remain light and airy rather than greasy. Using a slotted spoon, carefully remove each cruller from the oil and place them on a wire rack set over a baking sheet. This allows any residual oil to drip away while maintaining airflow around the crullers.
For an extra layer of oil absorption, you can place a few paper towels on the baking sheet, but make sure not to overcrowd the crullers. Allow them to cool slightly before glazing to ensure the glaze adheres properly.
Creating the Glaze: Tips for a Smooth and Glossy Finish
A well-made glaze is what transforms delicious crullers into irresistible treats. To create a classic glaze, you will need powdered sugar, milk (or cream), and vanilla extract. Start by sifting the powdered sugar into a mixing bowl to remove any lumps. Gradually whisk in milk until you achieve a smooth, pourable consistency.
For a thicker glaze, use less milk; for a thinner glaze, add more fluid. A good rule of thumb is to aim for a consistency similar to heavy cream. For added flavor, consider incorporating a splash of flavored extract or a hint of citrus juice.
Glazing the Crullers: Techniques for Even Coverage
To glaze your crullers, you’ll want to work quickly while they’re still warm. This allows the glaze to melt slightly and adhere better to the surface. Dip the top of each cruller into the glaze, spinning it slightly to ensure even coverage.
If you prefer a more artisanal look, you can drizzle the glaze over the crullers using a fork or a piping bag with a small round tip. Allow the glaze to set for a few minutes before serving, and consider adding a sprinkle of nonpareils or chocolate shavings for an extra touch of elegance.
Cooking Tips for Perfect Crullers
Achieving the perfect crullers involves mastering a few essential techniques and knowing how to troubleshoot common issues.
Recommended Frying Temperatures and Tools
As mentioned earlier, maintaining an oil temperature between 350°F to 375°F is crucial for perfect frying. A deep-fry thermometer is your best friend here. Additionally, using a heavy-bottomed pot or a deep fryer will help regulate the temperature more effectively than a standard frying pan.
How to Test Oil Temperature for Frying
If you don’t have a thermometer, there are a few methods to check the oil temperature. Drop a small piece of dough into the oil; if it sizzles and rises to the surface within a few seconds, the oil is ready. Another method is to sprinkle a few drops of water into the oil – if it sizzles and pops, you are good to go.
Adjusting Cooking Times for Different Sizes of Crullers
If you decide to make smaller or larger crullers, keep in mind that cooking times will vary. Smaller crullers will require less time – typically around 2-3 minutes on each side – while larger ones may need a few extra minutes. Always keep a close eye on the color and texture as they fry to avoid overcooking.
Troubleshooting Common Issues
– Crullers Not Puffing Up: This can happen if the oil is not hot enough or if the dough is too cold. Ensure your oil is at the correct temperature before frying and try to pipe the dough when it’s slightly warm.
– Glaze Consistency: If your glaze is too runny, add more powdered sugar. If it’s too thick, add a little more milk until it reaches the desired consistency.
Serving Suggestions
French crullers are delightful on their own, but a little creativity can elevate your presentation and pairing options.
Presentation Ideas for Serving French Crullers
Consider stacking your crullers on a decorative cake stand or a rustic wooden platter for an inviting display. Dusting them with a little powdered sugar or arranging them alongside fresh berries can add visual appeal.
Pairing Options
Crullers pair wonderfully with beverages such as coffee, tea, or even dessert wines. A rich coffee or a light herbal tea complements the sweetness of the crullers beautifully, while a dessert wine can enhance the overall experience for a special occasion.
Creative Variations on the Classic Cruller
Feel free to experiment with different flavor profiles! Try adding cocoa powder to the dough for a chocolate cruller or infuse your glaze with spices like cinnamon or nutmeg. You can also fill your crullers with pastry cream or custard for an indulgent treat.
Nutritional Information
While French crullers are undoubtedly a delightful indulgence, it’s important to be mindful of their nutritional content. A standard cruller, depending on its size, typically contains the following:
– Calories: Approximately 200-300 calories per cruller
– Fat: 10-15 grams
– Carbohydrates: 25-30 grams
– Protein: 2-3 grams
Discussion on Portion Sizes and Indulgence in Moderation
Given their rich ingredients and frying process, it’s best to enjoy crullers in moderation. Sharing with family and friends can make this treat even more enjoyable while keeping indulgence in check.
Conclusion
Making French crullers at home is not just about creating a delicious pastry; it’s an experience filled with joy and satisfaction. The process of mixing, piping, frying, and glazing allows you to connect with the art of pastry-making, a tradition that has been passed down through generations.
We encourage you to share this delightful experience with your loved ones. Whether enjoyed during a cozy breakfast, as an afternoon snack, or a sweet treat at a gathering, crullers hold a place in our culinary hearts. Embrace the cultural heritage of pastry-making, and let it inspire you to create lasting memories in your kitchen.