
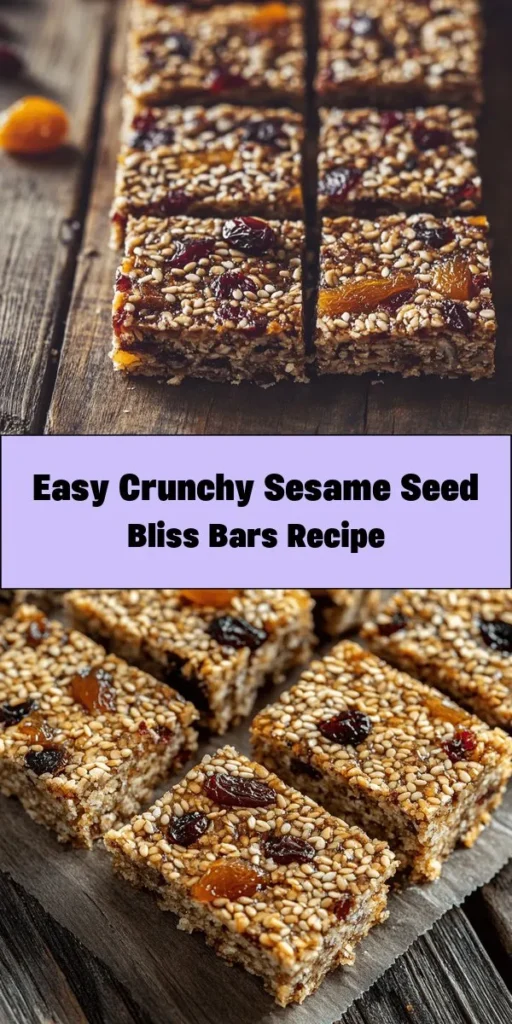
Introduction to Crunchy Sesame Seed Bliss Bars
Welcome to the delightful world of Crunchy Sesame Seed Bliss Bars, a snack that not only satisfies your sweet cravings but also nourishes your body. These bars are the perfect combination of health and indulgence, making them a fantastic choice for anyone looking to incorporate wholesome ingredients into their diet. Packed with nutritious elements, these bliss bars offer a satisfying crunch that appeals to both adults and children alike.
In today’s fast-paced world, finding snacks that are both nutritious and convenient can be a challenge. Crunchy Sesame Seed Bliss Bars rise to the occasion, providing a delicious option that is easy to prepare and perfect for any occasion. Whether you’re packing them for a lunchbox treat, enjoying a mid-afternoon snack, or serving them at a gathering, these bars are sure to be a hit.
As we explore the recipe for these blissful snacks, we will delve into the health benefits of the key ingredients, and guide you through the step-by-step process of making your own batch. Get ready to transform your snacking habits with this simple yet satisfying recipe.
Understanding the Ingredients
Sesame Seeds: A Nutritional Powerhouse
At the heart of our Crunchy Sesame Seed Bliss Bars lies the humble sesame seed. Often overlooked, these tiny seeds pack a powerful nutritional punch. Sesame seeds are rich in essential minerals, such as calcium, magnesium, and iron, making them a fantastic addition to your diet. They are also loaded with healthy fats, particularly polyunsaturated and monounsaturated fats, which are known to support heart health.
In addition to their minerals and fats, sesame seeds are abundant in antioxidants, which help combat oxidative stress in the body. This makes them not only a source of energy but also a contributor to overall wellness.
For those who wish to enhance the flavor of their bliss bars, toasting sesame seeds is a delightful option. Toasting brings out the natural oils and intensifies their nutty flavor, adding an extra layer of depth to your bars. If you choose to toast your sesame seeds, be sure to keep a close eye on them, as they can quickly go from perfectly golden to burnt.
Sweeteners: Honey vs. Maple Syrup
When it comes to sweetening our Crunchy Sesame Seed Bliss Bars, we have two fantastic options: raw honey and maple syrup. Both of these sweeteners are natural alternatives to refined sugars and come with their own unique health benefits.
Raw honey is not only a natural source of sweetness but also boasts antibacterial and anti-inflammatory properties. It contains antioxidants and is known to provide a quick energy boost, making it an excellent choice for athletes and anyone in need of an energy lift.
On the other hand, maple syrup is also rich in antioxidants and contains essential minerals like manganese and zinc. It has a lower glycemic index compared to honey, which means it may lead to a more gradual increase in blood sugar levels.
When choosing between honey and maple syrup, consider your dietary preferences and restrictions. For those following a vegan diet, maple syrup is the clear choice, while honey can be a great option for those looking for a richer flavor.
Nut Butters: Almond vs. Peanut
Next up in our ingredient lineup is nut butter, which not only adds creaminess to our bars but also boosts their nutritional profile. Almond butter and peanut butter are two popular choices, each with their own unique qualities.
Almond butter is known for its high vitamin E content, which is essential for skin health and acts as an antioxidant. It also provides a good source of magnesium, which plays a role in muscle function and energy production. Additionally, almond butter tends to have a slightly sweeter taste than peanut butter, making it a delightful addition to desserts.
On the other hand, peanut butter is a fan favorite due to its rich flavor and creamy texture. It is an excellent source of protein, which helps keep you feeling full and satisfied. However, it is important to note that peanut butter can be a common allergen, so it may not be suitable for everyone.
When selecting a nut butter, consider any allergies or dietary preferences you may have. Both almond and peanut butter can be used interchangeably in this recipe, so feel free to choose the one that suits your taste.
Flavor Enhancements: Vanilla and Salt
To elevate the flavor of our Crunchy Sesame Seed Bliss Bars, we will add a touch of vanilla extract and a pinch of salt. Vanilla extract is a wonderful flavor enhancer that adds warmth and depth to the bars. It pairs beautifully with the sweetness of the honey or maple syrup, creating a harmonious balance of flavors.
Salt, while often perceived as a simple seasoning, plays a crucial role in balancing sweetness. A small amount of salt can enhance the overall flavor profile of the bars, making them more satisfying and enjoyable to eat. The combination of sweet and salty creates a delightful taste experience that will have you reaching for another bar.
Adding Texture: Nuts and Dried Fruits
To truly make our Crunchy Sesame Seed Bliss Bars a delightful treat, we will also incorporate a variety of nuts and dried fruits. Nuts, such as almonds and walnuts, add not only crunch but also healthy fats and protein. They contribute to the overall texture of the bars, making each bite a satisfying experience.
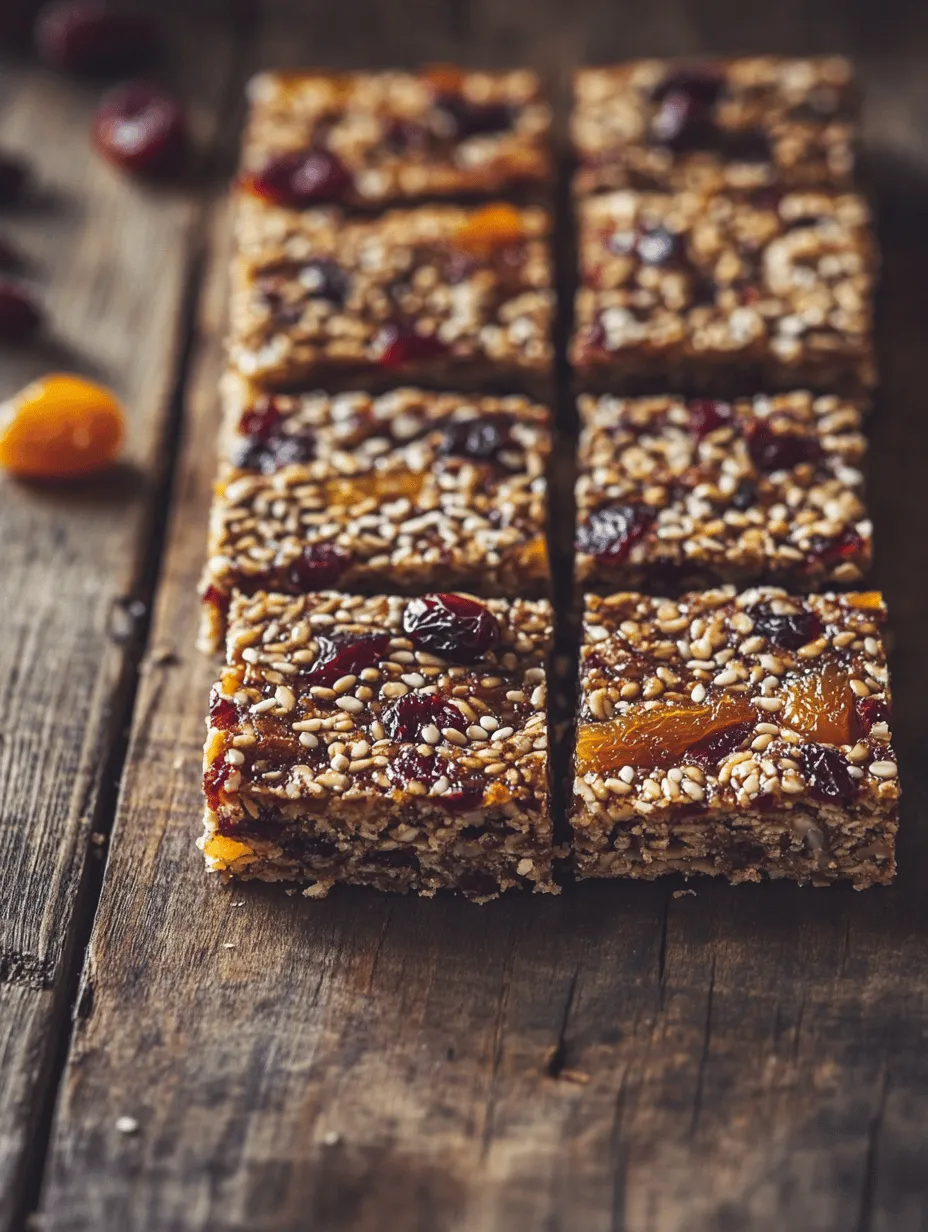
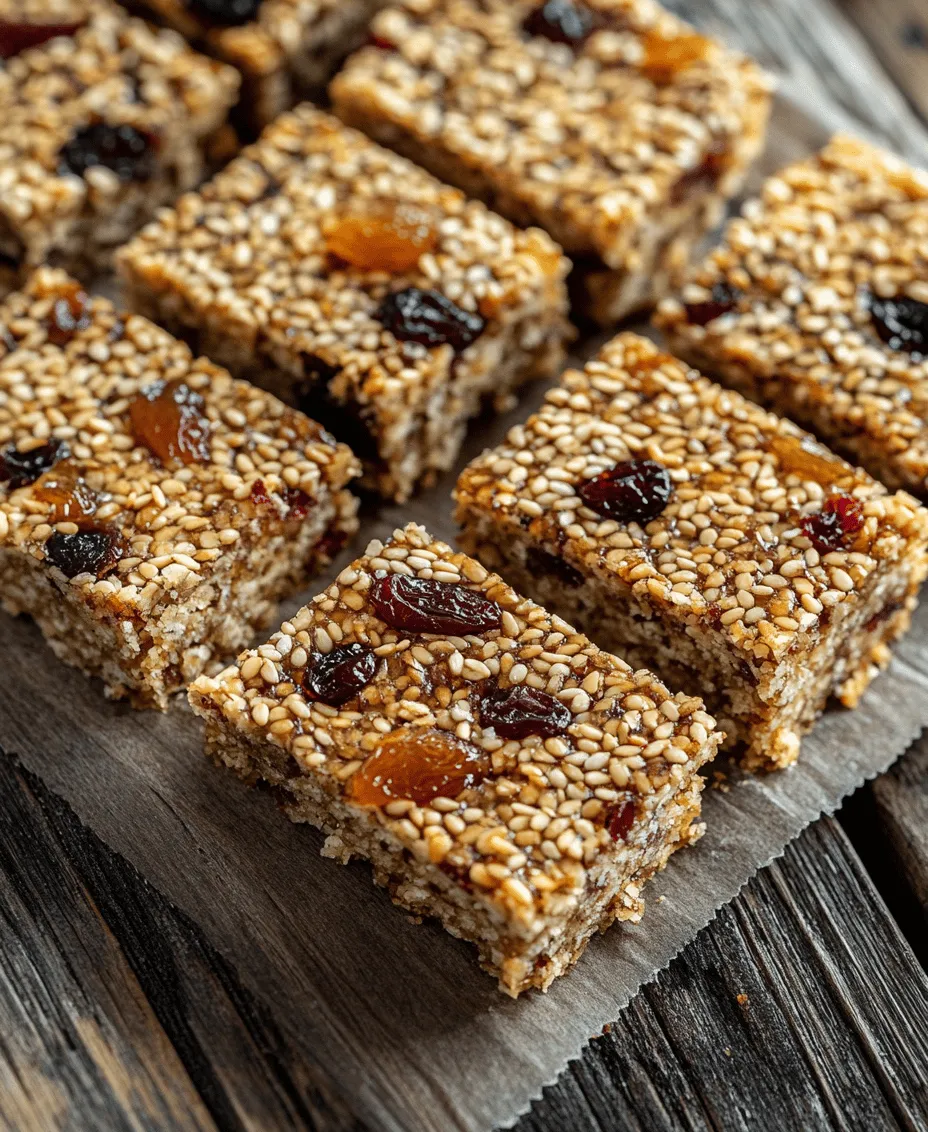
Dried fruits, such as cranberries and apricots, provide natural sweetness and chewiness, balancing the crunch of the nuts and sesame seeds. They also add a burst of flavor that complements the other ingredients beautifully. When selecting dried fruits, look for those without added sugars to keep your bars as healthy as possible.
Step-by-Step Instructions for Crunchy Sesame Seed Bliss Bars
Preparing Your Workspace
Before we dive into the recipe, it’s essential to prepare your workspace for a smooth cooking experience. Gather all the necessary tools and equipment you will need:
– An 8×8-inch baking dish
– Mixing bowls
– A spatula or wooden spoon for mixing
– A saucepan for heating ingredients (if needed)
– Parchment paper or cooking spray for greasing the baking dish
Having everything within reach will ensure you can focus on creating your delicious Crunchy Sesame Seed Bliss Bars. It’s also a good practice to clean and organize your workspace, making it more enjoyable to cook.
Pan Preparation
Proper preparation of your baking dish is crucial for easy removal of the bliss bars once they are set. Start by lining the 8×8-inch baking dish with parchment paper, leaving some overhang on the sides. This will allow you to lift the bars out easily once they are ready. If you don’t have parchment paper on hand, a light coat of cooking spray will also work, but parchment paper usually yields the best results.
Toasting Sesame Seeds
If you decide to toast your sesame seeds for enhanced flavor, now is the time to do so. Preheat a skillet over medium heat and add the sesame seeds, stirring frequently to prevent burning. Toast the seeds for about 3-5 minutes, or until they turn golden brown and emit a nutty aroma. Keep a close eye on them, as they can quickly go from perfectly toasted to burnt.
Once toasted, remove the skillet from the heat and transfer the sesame seeds to a bowl to cool. This step is optional, but it can significantly elevate the taste of your Crunchy Sesame Seed Bliss Bars, ensuring each bite is bursting with flavor.
Mixing the Wet Ingredients
Now that our workspace is prepared, and our sesame seeds are toasted, it’s time to mix the wet ingredients. In a mixing bowl, combine your choice of sweetener—either raw honey or maple syrup—with your selected nut butter. Use a spatula or wooden spoon to mix thoroughly until the two ingredients are well combined and smooth.
This step is vital as it creates the base for our bliss bars. Make sure there are no lumps, as a smooth mixture will ensure an even texture throughout the bars. If you find the mixture too thick, you can gently warm it over low heat, taking care not to overheat the nut butter.
Stay tuned for the next steps, where we will combine all the ingredients and form our Crunchy Sesame Seed Bliss Bars into the perfect snack!
Combining Dry Ingredients
To create the perfect Crunchy Sesame Seed Bliss Bars, the first step is to combine your dry ingredients effectively. Begin by taking your toasted sesame seeds, nuts, and dried fruits. Each of these components contributes to the overall texture and flavor of the bars, making their proper distribution key to achieving a balanced bite.
To ensure optimal mixing, place the toasted sesame seeds in a large mixing bowl. Next, add your chopped nuts—like almonds, walnuts, or pecans—along with your dried fruits, such as cranberries, apricots, or dates. Use a spatula or a large spoon to gently fold these ingredients together. The goal is to evenly disperse the nuts and fruits throughout the sesame seeds, which will help prevent clumping and ensure that every bite of the bliss bar has a rich blend of flavors and textures.
If you prefer a more rugged texture, you might consider chopping the nuts and dried fruits into smaller pieces, which can result in a chewier bar. However, if you enjoy larger bites, keep them in larger chunks. Just remember that consistency in size will help with even mixing and ensure that the flavors meld beautifully.
Bringing It All Together
Once your dry ingredients are well-mixed, it’s time to incorporate the wet mixture. This typically includes your choice of nut butter, sweetener (like honey or maple syrup), and a splash of vanilla extract. Pour this mixture over the dry ingredients in your mixing bowl.
The importance of thorough mixing cannot be overstated. Use a spatula to fold the wet ingredients into the dry mixture, ensuring that every sesame seed, nut, and piece of dried fruit is coated. This step is crucial as it binds the ingredients together, creating the cohesive texture and flavor profile of your bars. If the mixture seems too dry and crumbly, you can add a little more nut butter or sweetener to help it come together.
Mix until you achieve a sticky, well-combined mixture that holds together when pressed. Be patient during this step—ensuring that everything is thoroughly integrated will yield the best results.
Pressing the Mixture into the Pan
With your mixture fully combined, the next step is to transfer it into a lined baking pan. Choose an 8×8 inch or 9×9 inch pan for ideal bar thickness. Line the pan with parchment paper, leaving some overhang on the sides to make it easier to lift the bars out later.
Using a spatula or your hands, press the mixture evenly into the pan. It’s crucial to pack it firmly to ensure that the bars hold together once they’re set. If using your hands, you might want to slightly dampen them; this prevents the mixture from sticking. Aim for a uniform thickness across the pan, which helps the bars to cook evenly and makes cutting easier once they’re chilled.
For an even firmer texture, you can use a flat-bottomed object, like a measuring cup, to press down the mixture more evenly. Make sure to pay attention to the corners and edges to avoid any loose areas that may crumble later.
Chilling for Firmness
After pressing the mixture into the pan, the next step is to chill it. Place the pan in the refrigerator for at least two hours, or until the mixture feels firm to the touch. Chilling is essential as it allows the bars to set properly, making them easier to cut into squares or rectangles later.
During this time, the flavors will meld, and the nut butter and sweetener will solidify, creating the delightful chewy texture that characterizes these bliss bars. If you’re in a hurry, you can also place the pan in the freezer for about 30-45 minutes, but make sure to monitor it closely to avoid freezing.
Cutting and Serving Suggestions
Once the bars have set, it’s time to cut them into portions. Use the parchment paper overhang to lift the bars out of the pan, placing them on a cutting board. With a sharp knife, cut them into even squares or rectangles. If you want to create a uniform look, consider using a ruler to measure out each bar, especially if you’re preparing them for a gathering or special occasion.
For serving, consider placing the bars on a decorative plate or in an airtight container for storage. You can also wrap individual bars in parchment paper for easy grab-and-go snacks. If you’re feeling creative, drizzle some melted dark chocolate over the top for an elegant touch, or sprinkle some additional sesame seeds for visual appeal.
Nutritional Information and Benefits
Caloric Breakdown and Nutrition Facts
Each Crunchy Sesame Seed Bliss Bar, depending on how you cut them, contains approximately 150 calories. Here’s a nutritional breakdown per serving (assuming you cut 12 bars):
– Calories: 150
– Protein: 5g
– Fats: 8g
– Carbohydrates: 16g
– Fiber: 2g
– Sugars: 6g
These bars provide a balanced combination of macronutrients, making them a suitable snack option for energy throughout the day.
Health Benefits of Key Ingredients
The ingredients in these bliss bars boast numerous health benefits. For instance, sesame seeds are rich in healthy fats, protein, and minerals like calcium and magnesium, which are essential for bone health. Nuts provide a great source of omega-3 fatty acids, which are known for their heart-protective properties. Dried fruits add not only sweetness but also fiber and antioxidants, which can support digestive health and overall well-being.
The combination of these ingredients makes the Crunchy Sesame Seed Bliss Bars not only a satisfying treat but also a nutritious one, perfect for boosting energy levels before or after workouts.
Creative Variations and Add-Ons
Flavored Bliss Bars
One of the best aspects of these bliss bars is their versatility. You can easily customize the flavor profile by experimenting with different nut butters, such as almond, cashew, or even sunflower seed butter for a nut-free option. Additionally, consider using different sweeteners like agave syrup or coconut nectar to alter the sweetness and flavor nuances.
Spices such as cinnamon or nutmeg can also be added for warmth and depth of flavor. A pinch of sea salt can enhance the overall taste, balancing the sweetness with a touch of savory.
Customizing with Superfoods
For those looking to enhance the nutritional content even further, consider incorporating superfoods like chia seeds, hemp seeds, or even protein powder. Chia seeds can add a nice crunch while boosting fiber, whereas hemp seeds are rich in protein and essential fatty acids. You can mix in a couple of tablespoons of these superfoods while combining your dry ingredients to elevate your bliss bars.
Storage and Shelf Life
Best Practices for Storing Bars
To maintain the freshness and flavor of your Crunchy Sesame Seed Bliss Bars, store them in an airtight container at room temperature for up to a week. If you want to extend their shelf life, consider refrigerating them, where they can last for up to two weeks.
For longer storage, freeze the bars by wrapping them individually in plastic wrap or placing them in a freezer-safe container. They can last for up to three months in the freezer. When you’re ready to enjoy them, simply thaw them in the refrigerator or at room temperature.
Shelf Life and Usage Ideas
These bliss bars are incredibly versatile and can be enjoyed in various ways. They make a perfect snack for school lunches, a quick breakfast on the go, or a satisfying post-workout treat. You can also crumble them over yogurt or oatmeal for added texture and flavor, or pair them with fresh fruit for an extra nutrient boost.
Conclusion on Crunchy Sesame Seed Bliss Bars
Crunchy Sesame Seed Bliss Bars are a delightful and nutritious treat that can easily fit into any lifestyle. With simple ingredients and a straightforward preparation process, these bars provide a satisfying snack that can be enjoyed throughout the week. By understanding the health benefits of each ingredient and following the step-by-step instructions, you can create a delightful snack that not only tastes great but also nourishes your body. Enjoy making and sharing these blissful bars with family and friends!
