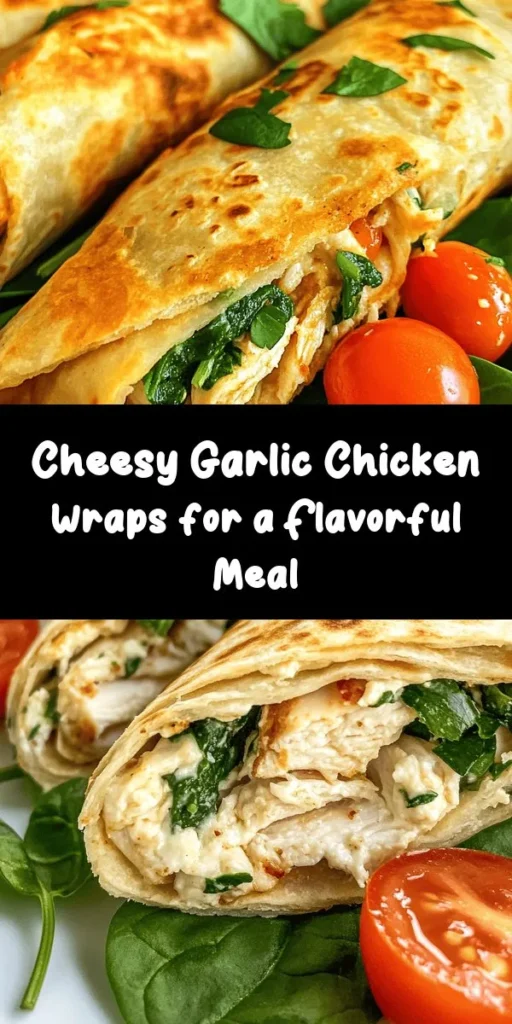
In the world of quick and satisfying meals, Cheesy Garlic Chicken Wraps stand out as a delightful option that is both easy to prepare and incredibly delicious. This recipe combines savory flavors and a satisfying texture to create a dish that is perfect for a family dinner, meal prep, or casual gatherings with friends. Whether you’re a seasoned home cook or just starting, these wraps are approachable and adaptable, making them a must-try for anyone looking to whip up something special without spending hours in the kitchen.
The versatility of Cheesy Garlic Chicken Wraps is one of their biggest appeals. You can easily customize them to suit various tastes and dietary preferences. The wraps can be served with a side salad for a complete meal or enjoyed on their own as a hearty snack. Plus, they are an excellent way to use up leftover chicken, making them a practical choice for busy weeknights. With just a few accessible ingredients, this recipe can be thrown together quickly, allowing you to enjoy a comforting meal without the stress.
Understanding the Ingredients
Before diving into the preparation steps, let’s take a closer look at the main ingredients that come together to make these Cheesy Garlic Chicken Wraps irresistible. Each component plays a crucial role in delivering flavor and texture, and knowing the purpose of each ingredient can help you make informed choices—especially if you need to consider substitutions.
Exploring Cooked Chicken
At the heart of the Cheesy Garlic Chicken Wraps is, of course, the chicken. Using cooked chicken not only adds convenience to the recipe but also enhances its flavor. You can source your cooked chicken in several ways:
1. Rotisserie Chicken: This is the easiest option. Rotisserie chickens are widely available at grocery stores, and they offer a rich, roasted flavor that complements the other ingredients beautifully. Simply shred the chicken, and you’re ready to go.
2. Poached Chicken: If you prefer to cook your chicken from scratch, poaching is a simple technique that yields moist and tender chicken. Just simmer chicken breasts in water or broth for about 15-20 minutes until fully cooked. Allow it to cool before shredding.
3. Leftover Chicken: This recipe is also a fantastic way to utilize leftover cooked chicken from previous meals. The flavors meld together wonderfully, and it’s a great way to minimize food waste.
Delving into Cheeses
Cheese is another star ingredient in this wrap, contributing to its creamy texture and rich flavor. For this recipe, we typically use two types of cheese:
1. Mozzarella: Known for its mild flavor and excellent melting properties, mozzarella cheese provides a gooey, cheesy experience that is hard to resist. It creates a luscious, stretchy texture when heated.
2. Cream Cheese: This cheese adds a delightful creaminess to the filling. Its tangy taste balances the richness of the mozzarella, creating a well-rounded flavor profile.
For those with dietary restrictions, there are several alternatives you can consider. Dairy-free cheese options are available for vegans, and low-fat cream cheese can be used for a lighter version of the recipe. Additionally, incorporating ricotta cheese can bring a different texture while still maintaining the creaminess you want.
The Importance of Garlic
Garlic is often considered the “secret ingredient” that can elevate a dish from ordinary to extraordinary. In Cheesy Garlic Chicken Wraps, garlic plays a pivotal role in enhancing the overall flavor profile.
– Flavor Enhancer: The pungent aroma and warming flavor of garlic blend beautifully with the savory chicken and creamy cheeses, creating a mouthwatering experience.
– Health Benefits: Garlic is also known for its numerous health benefits, including its potential to boost the immune system and its anti-inflammatory properties.
When it comes to using garlic, you can choose between fresh garlic cloves or pre-minced garlic from a jar. Fresh garlic provides a more robust flavor, but if you’re short on time, pre-minced garlic can work just as well. If using fresh garlic, note that one clove typically equals about one teaspoon of pre-minced garlic.
Herbs and Seasonings
To round out the flavors in your Cheesy Garlic Chicken Wraps, we’ll incorporate herbs and seasonings that add aromatic depth. The key players here are:
– Italian Seasoning: This blend of dried herbs typically includes basil, oregano, thyme, and rosemary. It complements the cheese and chicken beautifully, lending a warm, herby flavor that brings the dish together.
– Fresh Parsley: Chopped fresh parsley adds a burst of color and a fresh taste that brightens the overall flavor. It also serves as a garnish, making your wraps visually appealing.
For those who want to customize their wraps further, consider adding other herbs like fresh basil or cilantro for a different twist. You can also experiment with additional spices such as paprika or crushed red pepper flakes for some heat.
Preparation Steps
Now that we have a good understanding of the ingredients, let’s delve into the preparation process for these Cheesy Garlic Chicken Wraps. The following steps will guide you through mixing the filling and assembling the wraps, ensuring clarity and ease of understanding.
Mixing the Filling
The first step in creating these delicious wraps is to mix the filling ingredients together. Here’s a step-by-step guide to ensure you achieve the right consistency and flavor balance:
1. Combine the Cheeses: In a large mixing bowl, add the shredded cooked chicken, mozzarella cheese, and cream cheese. If you’re using leftover chicken, make sure it’s shredded into bite-sized pieces for a uniform texture.
2. Add the Garlic: Mince the garlic (if using fresh) and add it to the bowl. If you’re using pre-minced garlic, just scoop out the appropriate amount and add it in.
3. Season the Mixture: Sprinkle in the Italian seasoning and a pinch of salt and pepper. These seasonings will amplify the flavors of the chicken and cheese, so don’t be shy with them.
4. Incorporate Fresh Parsley: Finally, add chopped fresh parsley to the mixture. This will not only enhance the flavor but also add a lovely color to the filling.
5. Mix Well: Using a spatula or a wooden spoon, mix all the ingredients until they are well combined. The goal is to create a cohesive filling that holds together but is still spreadable. If the mixture feels too dry, you can add a splash of chicken broth or a bit more cream cheese to achieve the desired consistency.
Assembling the Wraps
Once your filling is ready, it’s time to assemble the wraps. This step is straightforward and allows for some creativity in presentation.
1. Choose Your Wraps: Select your preferred type of wrap. Flour tortillas are classic, but you can also use whole wheat tortillas, spinach wraps, or even gluten-free options.
2. Spread the Filling: Lay a tortilla flat on a clean surface. Spoon a generous amount of the cheesy garlic chicken filling onto the center of the tortilla. Be mindful not to overfill, as this can make rolling difficult.
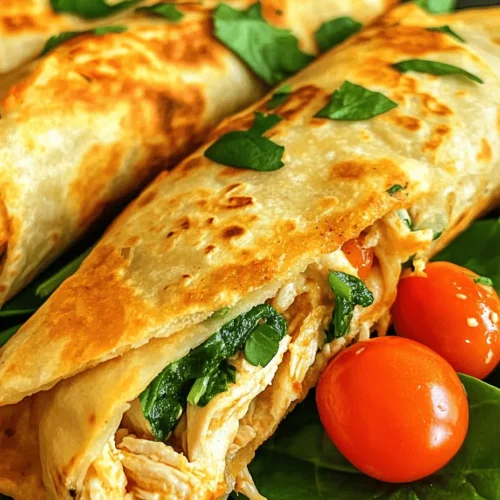
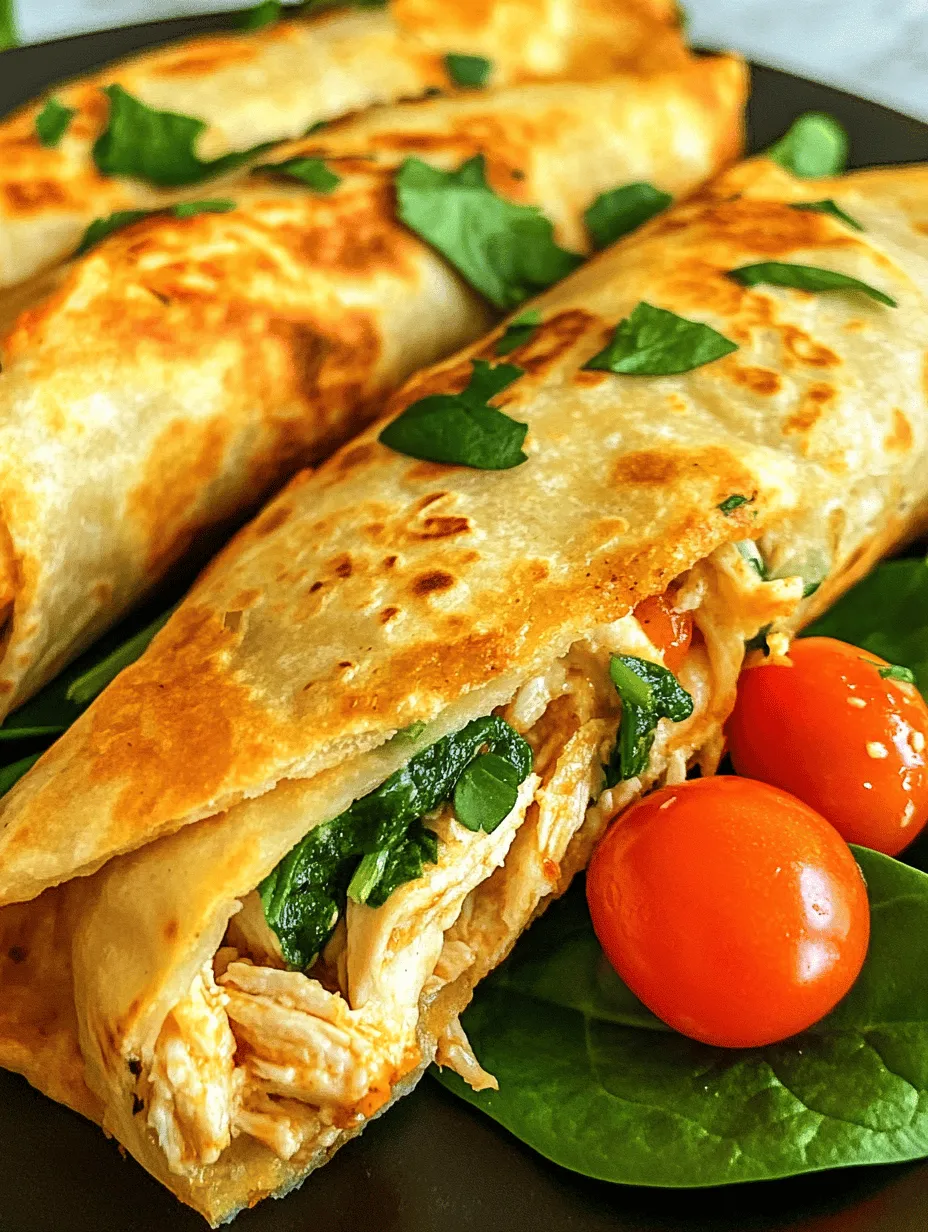
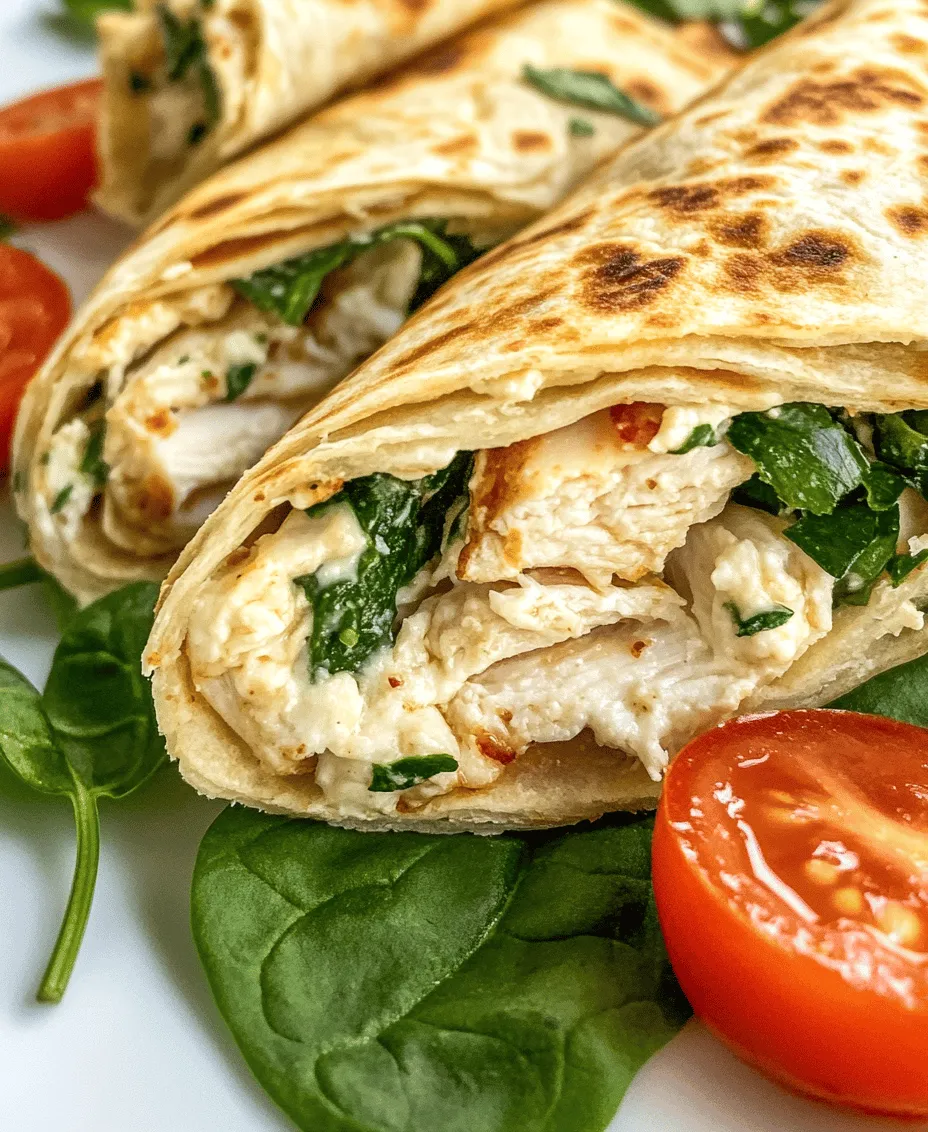
3. Wrap It Up: Fold the sides of the tortilla over the filling and then roll it tightly from the bottom up. Ensure the filling is well enclosed within the wrap to prevent it from spilling out during cooking.
4. Secure the Wrap: If desired, you can secure the wraps with toothpicks or wrap them in parchment paper for easier handling, especially if you’re preparing them ahead of time.
5. Cooking Options: Depending on how you like your wraps, you can either grill them on a pan or in an air fryer until they are golden and crispy. For a softer wrap, you can simply serve them as is or warm them slightly in the microwave.
With the wraps assembled, you’re well on your way to enjoying a delicious meal that’s packed with flavor. Stay tuned for the next part of this article, where we will explore cooking tips, serving suggestions, and answer some common questions about this delightful recipe.
Instructions for Laying Out the Tortillas and Portioning the Filling
To begin assembling your Cheesy Garlic Chicken Wraps, it’s essential to lay out your tortillas properly. Start by selecting a clean, flat surface or a large cutting board. This will give you ample space to work and keep your tortillas from sticking. If you prefer, you can warm the tortillas slightly in a microwave for about 10 seconds. This will make them more pliable and easier to fold without tearing.
Next, take your tortillas and place them on the workspace. For an even distribution of flavors, use about 1/2 cup of the cheesy garlic chicken filling for each tortilla. Spoon the filling onto the center of each tortilla, ensuring there’s enough room around the edges to facilitate folding. You can adjust the quantity based on your preference and the size of the tortillas you’re using. If you want to keep things neat, avoid overstuffing—this will make rolling the wraps more manageable.
Techniques for Folding and Rolling the Wraps
Folding and rolling the wraps correctly is crucial to ensure they hold together during cooking. After placing the filling, begin by folding the sides of the tortilla inward over the filling. This helps contain the ingredients and prevents spillage. Next, starting from the bottom of the tortilla (the side closest to you), gently lift and roll the tortilla away from you, tucking in the filling as you go. Continue to roll tightly until you reach the top edge of the tortilla.
To secure the wrap, you can lightly brush the top edge with a bit of water or a beaten egg. This acts as a glue that keeps the wrap from unfolding during the cooking process. Alternatively, you can also use toothpicks to hold the wraps together until they are cooked. This technique ensures that your Cheesy Garlic Chicken Wraps remain intact, allowing for a delightful bite every time.
Cooking the Wraps
Once your wraps are rolled, it’s time to cook them to perfection. Begin by preheating a skillet over medium heat for about 3-5 minutes. A well-preheated skillet is essential as it creates a favorable environment for achieving that golden-brown finish on the wraps. While the skillet is heating, brush both sides of your wraps lightly with olive oil. This not only enhances flavor but also helps create a crispy exterior.
When the skillet is ready, place the wraps seam-side down in the skillet. Allow them to cook for 3-4 minutes on one side without moving them, as this will help develop a nice crust. After the first side is golden brown, carefully flip the wraps using a spatula. Cook the other side for an additional 3-4 minutes. To check for doneness, gently press down on the wraps with the spatula; they should feel firm and slightly crisp.
Serving Suggestions
Cheesy Garlic Chicken Wraps are incredibly versatile, making them suitable for various occasions. Here are some creative ways to serve them:
Pairing Options
To elevate your wrap experience, consider serving your Cheesy Garlic Chicken Wraps with complementary dips. Classic options like salsa, ranch dressing, or a homemade garlic aioli can enhance the flavor profiles of the wraps. These dips not only add a creamy texture but also bring additional flavor bursts that pair beautifully with the savory chicken and cheese.
For side dishes, think about fresh salads or roasted vegetables. A simple green salad with a light vinaigrette can provide a refreshing contrast to the richness of the wraps. Alternatively, roasted seasonal vegetables, drizzled with olive oil and herbs, can add color and nutritional value to your meal.
Presentation Ideas
Presentation plays a significant role in making your meal inviting. When plating the Cheesy Garlic Chicken Wraps, consider cutting them diagonally in half to display the delicious filling. Arrange them neatly on a platter and garnish with fresh herbs like parsley or cilantro for a pop of color and flavor.
For a casual dining experience, consider serving the wraps on a wooden board with the dips and side dishes arranged around them. This rustic presentation style encourages sharing and creates a warm, inviting atmosphere for gatherings.
Nutritional Profile
Understanding the nutritional aspects of your Cheesy Garlic Chicken Wraps is essential for maintaining a balanced diet. Each wrap is a good source of protein, thanks to the chicken and cheese, making it a satisfying meal choice. The chicken contributes essential amino acids necessary for muscle growth and repair, while cheese adds a creamy texture and depth of flavor.
Balancing Flavor and Health
Incorporating vegetables like spinach or tomatoes into the filling not only enhances the flavor but also boosts the nutritional value. Spinach is rich in vitamins A, C, and K, and adds a lovely earthy flavor that complements the chicken and cheese. Tomatoes provide antioxidants and add a touch of acidity that brightens the overall dish.
Customization for Dietary Needs
One of the best aspects of Cheesy Garlic Chicken Wraps is their adaptability to various dietary preferences. For those following a gluten-free diet, consider using gluten-free tortillas made from almond flour or rice flour. These alternatives ensure everyone can enjoy the wraps without compromising their dietary restrictions.
If you’re looking to create a vegetarian version, simply replace the chicken with grilled vegetables, such as bell peppers, zucchini, and mushrooms. Add extra cheese or a plant-based cheese alternative for added richness. For a lighter option, you can reduce the amount of cheese used or opt for low-fat cheese varieties without sacrificing flavor.
Conclusion
Cheesy Garlic Chicken Wraps are a delightful and simple meal choice that combines wholesome ingredients with comforting flavors. Their versatility makes them perfect for weeknight dinners, casual gatherings, or even meal prep for the busy week ahead. By exploring different variations and personalizing your wraps, you can cater to your taste preferences and dietary needs, ensuring that this dish becomes a staple in your culinary repertoire.
The joy of cooking and sharing these wraps with family and friends makes them not just a meal but an experience. With their easy preparation and satisfying flavors, Cheesy Garlic Chicken Wraps are sure to become a beloved favorite in your home. So, gather your ingredients, get creative, and enjoy the delightful process of cooking this delicious dish!