
Introduction
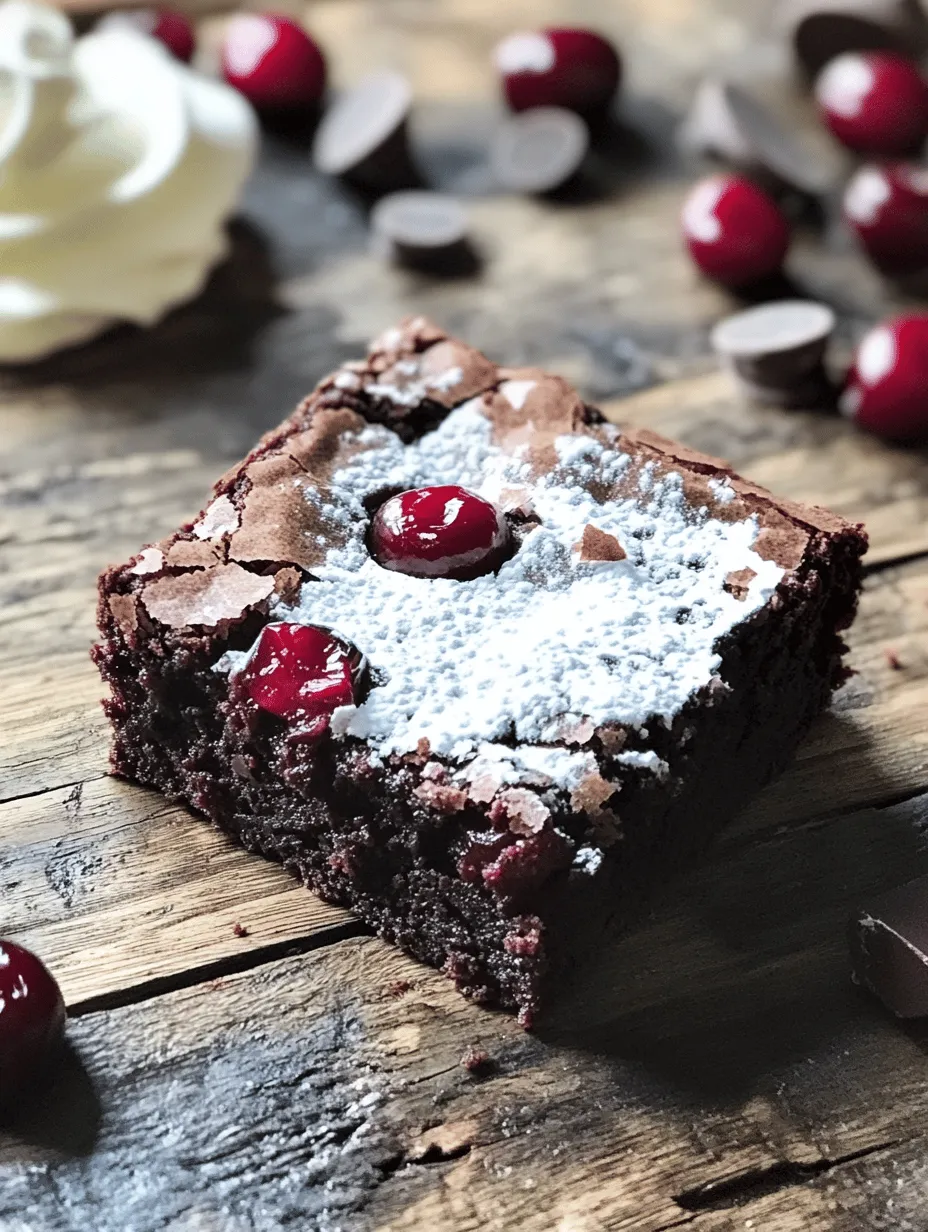
Black Forest Brownies are a delightful and indulgent treat that combines rich chocolate brownie goodness with the tart sweetness of cherries. Inspired by the classic Black Forest Cake, these brownies bring a modern twist to a beloved dessert, making it easier to enjoy this flavor combination in a simpler form. The decadent chocolate pairs beautifully with the vibrant cherry flavor, creating a dessert that is sure to please anyone with a sweet tooth. Whether you’re hosting a gathering or simply looking to satisfy a craving, the Black Forest Brownies are an excellent choice.
The origins of the Black Forest Cake itself are steeped in history, tracing back to the Black Forest region in Germany, known as Schwarzwald. This region is famous not only for its beautiful landscapes but also for its rich culinary traditions, including the use of dark chocolate and sour cherries. The cake’s signature layers of chocolate, whipped cream, and cherries have inspired countless variations, and the Black Forest Brownies are a delicious result of that creative culinary spirit. By transforming the classic cake into a fudgy brownie, you get all the flavors you love in a more compact and convenient form.
The Allure of Black Forest Desserts
The history of Black Forest desserts is as rich as their flavors. The traditional Black Forest Cake, known as Schwarzwälder Kirschtorte, dates back to the early 20th century. It is said to have been inspired by a local cherry brandy known as Kirschwasser, which is made from sour cherries. The cake features layers of chocolate sponge, whipped cream, and cherries, all harmoniously combined to create a dessert that captures the essence of the Black Forest region.
Chocolate and cherries have long been celebrated in culinary traditions for their complementary flavors. Chocolate’s deep, rich notes pair beautifully with the tartness of cherries, creating a balance that is both satisfying and refreshing. This combination is not only delectable but also visually appealing, making it a popular choice for desserts.
What sets Black Forest Brownies apart from other dessert options is their unique texture and flavor profile. Unlike traditional cakes, brownies offer a denser, fudgier experience, making each bite rich and satisfying. The addition of cherries adds a burst of tartness that contrasts perfectly with the sweetness of the chocolate, elevating these brownies to a gourmet level. They are perfect for any occasion, from casual get-togethers to elegant dinner parties.
Understanding the Ingredients
Creating the perfect batch of Black Forest Brownies requires a careful selection of ingredients, each playing a crucial role in achieving the desired flavor and texture. Here’s a closer look at the key components that make these brownies irresistible:
1. Unsalted Butter: The foundation of many baked goods, unsalted butter is essential for achieving the right texture and flavor in brownies. It adds richness and moisture, contributing to the fudgy consistency that makes brownies so beloved. Using unsalted butter allows you to control the level of salt in the recipe, ensuring a balanced flavor profile.
2. Semi-sweet Chocolate: The star of the show, semi-sweet chocolate provides the deep chocolate flavor that defines these brownies. Its melting characteristics allow for a smooth incorporation into the batter, resulting in a uniform texture. The sweetness of semi-sweet chocolate strikes the perfect balance, enhancing the overall flavor without overpowering the other ingredients.
3. Granulated and Brown Sugar: The combination of granulated sugar and brown sugar is key to achieving the ideal brownie texture. Granulated sugar contributes to the structure of the brownies, while brown sugar adds moisture and a hint of caramel flavor. This combination ensures that the brownies are both chewy and rich, striking the perfect balance.
4. Eggs: Eggs serve as the binding agent in brownie recipes, helping to create a cohesive batter. They also contribute moisture and richness, which are essential for achieving that fudgy texture. The number of eggs used can also affect the density of the brownies, so it’s important to follow the recipe closely.
5. Vanilla Extract: A touch of vanilla extract enhances the overall flavor of the brownies, bringing out the richness of the chocolate and the sweetness of the cherries. It’s a simple yet effective way to elevate the taste profile of baked goods.
6. All-purpose Flour and Cocoa Powder: All-purpose flour provides the structure needed for the brownies to hold their shape, while cocoa powder intensifies the chocolate flavor. The right balance of these two ingredients ensures that the brownies are neither too dry nor too gooey, resulting in a perfect fudgy texture.
7. Salt: A pinch of salt is crucial in balancing the sweetness of the sugars and enhancing the flavors of the other ingredients. It elevates the overall taste, making each bite more enjoyable.
8. Sour Cherries: The star fruit in this recipe, sour cherries add a delightful tartness that cuts through the richness of the chocolate. They can be used fresh, but canned or frozen sour cherries are often more convenient and yield great results. When using canned cherries, be sure to drain them well to avoid excess moisture in the brownies.
9. Dark Chocolate Chips (Optional): For those looking to indulge even further, adding dark chocolate chips to the batter can enhance the chocolate flavor and provide a delightful texture. The melted chips will create pockets of gooey chocolate within the brownies, making each bite even more decadent.
Step-by-Step Instructions for Perfect Brownies
Now that you understand the key ingredients, it’s time to dive into the step-by-step instructions for making Black Forest Brownies. Baking is as much about technique as it is about ingredients, and following these steps will help you achieve the perfect result.
1. Preheat the Oven and Prepare the Baking Pan: Start by preheating your oven to 350°F (175°C). This step is crucial as it ensures that your brownies bake evenly and achieve the right texture. While the oven is heating, prepare your baking pan. A 9×9-inch square pan is ideal for this recipe. You can choose to grease the pan with butter or line it with parchment paper for easy removal. If using parchment paper, allow some overhang on the sides to create “handles” for lifting the brownies out later.
2. Importance of Oven Temperature in Baking: Oven temperature can significantly impact the outcome of your brownies. Too low, and they may not set properly; too high, and they may become dry or burn. An oven thermometer can help ensure accuracy, as many home ovens can be off by several degrees.
3. Greasing vs. Parchment Paper for Easy Removal: While greasing the pan works well, using parchment paper can simplify the process of removing the brownies once baked. If you choose to grease, be sure to coat the pan liberally to prevent sticking. If using parchment paper, make sure it fits snugly in the corners to prevent uneven baking.
4. Melting the Butter and Chocolate: The next step is to melt the unsalted butter and semi-sweet chocolate together. This can be done either on the stovetop using a double boiler or in the microwave. If using the microwave, heat in short bursts, stirring frequently to avoid burning. The goal is to achieve a smooth, glossy mixture that can be easily incorporated into the brownie batter. Allow the melted mixture to cool slightly before proceeding to the next step, as adding hot chocolate to the eggs can cause them to scramble.
5. Combining the Ingredients: In a mixing bowl, combine the granulated sugar and brown sugar with the slightly cooled chocolate and butter mixture. Stir until well combined. Then, add the eggs one at a time, mixing thoroughly after each addition. Follow this with the vanilla extract. The mixture should be smooth and glossy at this point.
6. Incorporating the Dry Ingredients: In a separate bowl, whisk together the all-purpose flour, cocoa powder, and salt. Gradually fold the dry ingredients into the chocolate mixture, being careful not to overmix. The batter should be thick and fudgy.
7. Adding the Sour Cherries: Finally, gently fold in the sour cherries, ensuring they are evenly distributed throughout the batter. If you’re using dark chocolate chips, this is also the time to add them for extra chocolatey goodness.
With these initial steps complete, you’re well on your way to creating a batch of decadent Black Forest Brownies. The next stage will involve baking and perfecting your creation, so stay tuned for the following parts of this recipe!

Mixing Sugars and Eggs: Techniques to Ensure a Creamy Texture
To achieve the ideal creamy texture for your Black Forest Brownies, start by mixing the sugars and eggs correctly. Combine granulated sugar and brown sugar in a large mixing bowl. The brown sugar adds moisture and a rich flavor, while the granulated sugar provides structure. Using an electric mixer on medium speed, beat the sugars and eggs together until the mixture becomes light and fluffy. This process usually takes about 3-5 minutes. The key here is to incorporate air into the batter, which results in a lighter brownie.
Ensure that your eggs are at room temperature; this helps them mix more evenly with the sugars, preventing any clumps. If you’re using an electric mixer, remember to scrape down the sides of the bowl periodically to ensure all ingredients are well combined. The mixture should be smooth and pale in color, indicating that it’s ready for the next step.
Combining Dry Ingredients: Importance of Not Overmixing
Once your wet ingredients are beautifully combined, it’s time to introduce the dry ingredients. In a separate bowl, sift together the flour, cocoa powder, baking powder, and a pinch of salt. Sifting helps to aerate the dry ingredients and breaks up any lumps, ensuring a uniform mixture.
When combining the wet and dry ingredients, be cautious not to overmix. Gently fold the dry ingredients into the wet mixture using a spatula or wooden spoon. The goal is to just incorporate the flour mixture until you see no more dry streaks. Overmixing can lead to tough brownies due to the development of gluten, which can detract from the desired fudgy texture. Aim for a batter that is thick and slightly lumpy, as this indicates the perfect consistency for brownies.
Folding in Cherries and Chocolate Chips: Ensuring Even Distribution in the Batter
Now comes the fun part—adding the cherries and chocolate chips! To enhance the Black Forest experience, use pitted and chopped fresh or frozen cherries. If fresh cherries are out of season, you can also use jarred cherries in syrup; just make sure to drain them well. Gently fold the cherries and chocolate chips into the brownie batter, ensuring an even distribution throughout. This step is crucial, as you want every bite to be bursting with chocolate and cherry goodness.
Be careful not to overmix during this step; you want the cherries and chocolate to be evenly spread without breaking them down too much. This gentle folding technique will help maintain the integrity of the cherries and the chocolate chips, giving you delightful bursts of flavor in every piece.
Baking the Brownies: Key Indicators for Doneness
When you’re ready to bake, preheat your oven to 350°F (175°C) and prepare a baking pan by greasing it or lining it with parchment paper. Pour the brownie batter into the prepared pan, smoothing the top with a spatula for an even bake.
Bake the brownies for approximately 25-30 minutes. Keep an eye on them towards the end of the baking time, as ovens can vary. The brownies are done when the edges are set, and the center still looks slightly soft. The top should appear slightly cracked, which is a good indicator of doneness.
The Toothpick Test Explained
A reliable method to check for brownie doneness is the toothpick test. Insert a toothpick into the center of the brownies. If it comes out with moist crumbs clinging to it, the brownies are ready to be taken out of the oven. If the toothpick comes out clean, they may be overbaked. Remember that the brownies will continue to cook slightly as they cool, so it’s okay to take them out when they look a little underbaked.
Cooling and Serving: Importance of Cooling Time for Texture
After baking, allow the brownies to cool in the pan for at least 10-15 minutes. This cooling time is essential as it helps the brownies set properly, making them easier to cut. For even better texture, transfer them to a wire rack to cool completely. Once cooled, slice them into squares or rectangles, depending on your preferred serving size.
Variations and Customizations
While the classic Black Forest Brownies are delicious, consider trying out some variations to suit your taste:
– Adding Nuts for Texture: For a delightful crunch, fold in some chopped walnuts or pecans along with the cherries and chocolate chips. The nuts will add a unique flavor and texture that complements the rich chocolate and cherry combination.
– Using Different Types of Chocolate: Experiment with different types of chocolate to create varying flavor profiles. Try using milk chocolate for a sweeter brownie or white chocolate for a contrasting sweetness that pairs beautifully with the tartness of the cherries.
– Incorporating Spices: For an unexpected twist, add a pinch of cinnamon or nutmeg to the dry ingredients. This subtle spice will elevate the flavors and add warmth to the brownies, making them even more comforting.
Suggestions for Serving and Pairing
To enhance your Black Forest Brownies, consider serving them with a dollop of whipped cream or a scoop of vanilla ice cream. The creamy textures of whipped cream or ice cream perfectly complement the fudgy brownies, creating a luxurious dessert experience.
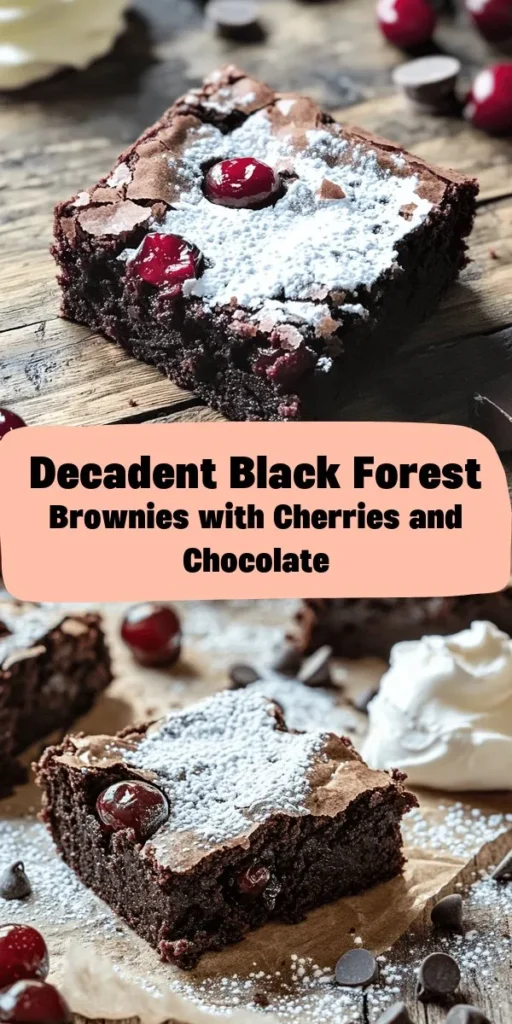
For special occasions, present the brownies with a drizzle of chocolate sauce and a sprinkle of powdered sugar for an elegant touch. You can also serve them alongside fresh cherries or a cherry compote for a beautiful presentation.
Nutritional Information
Understanding the nutritional breakdown of your Black Forest Brownies can help you enjoy them mindfully. Each brownie contains approximately 200-250 calories, depending on the size and specific ingredients used. These brownies typically offer around 25g of carbohydrates, 3g of protein, and 10g of fat per serving.
While indulgent desserts are a delightful treat, it’s important to enjoy them in moderation. Savoring a brownie as part of a balanced diet allows you to appreciate the flavors without guilt. Remember, desserts are meant to be enjoyed, so don’t shy away from treating yourself!
The Joy of Baking and Sharing
Baking is not just about the final product; it’s also about the joy and connection it brings. Sharing homemade desserts with family and friends creates memorable moments and strengthens bonds. Whether you’re celebrating a birthday, holiday, or just a weekend gathering, these Black Forest Brownies can be the highlight of your dessert table.
Encouraging creativity in the kitchen is also part of the fun. Feel free to experiment with the recipe, add your favorite ingredients, or even challenge your friends to a brownie bake-off. The kitchen can be a place of joy and exploration, and this recipe offers a fantastic base for your culinary creativity.
Conclusion
In conclusion, Black Forest Brownies are a delightful fusion of rich chocolate and tangy cherries, making them an irresistible treat for any occasion. With the right techniques and a dash of creativity, you can create a dessert that not only tastes amazing but also brings people together.
We encourage you to try this recipe, immerse yourself in the baking process, and enjoy every step. Homemade desserts have a unique way of creating memories, and these brownies are sure to become a favorite in your household. So grab your ingredients, preheat your oven, and get ready to indulge in the deliciousness of Black Forest Brownies!
