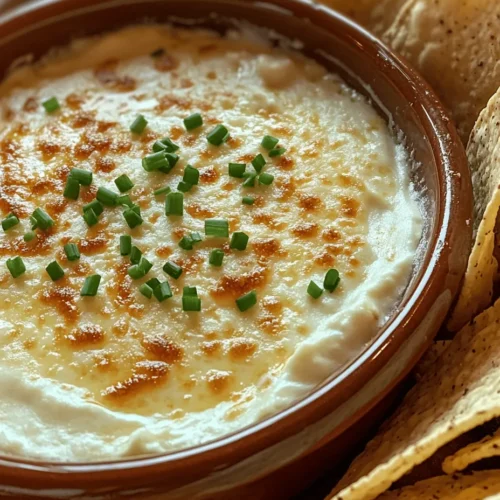
When it comes to appetizers that can capture the attention and taste buds of guests, few dishes match the allure of a warm, cheesy dip. Enter the Cheesy Baked Onion Bliss Dip — a delightful concoction that seamlessly blends gooey cheese, sweet caramelized onions, and savory spices into a comforting dish that’s perfect for any gathering. Whether you’re hosting a game night, celebrating the holidays, or simply enjoying a casual get-together, this dip promises to elevate your appetizer game and leave your guests reaching for more.
The Allure of Cheesy Dips
Cheesy dips have maintained their status as a crowd favorite, and for good reason. They are not just a culinary treat; they are an experience that brings people together. Picture yourself at a lively game night, laughter and excitement filling the air, and in the center of it all, a bubbling dish of cheesy goodness beckoning to be devoured. The communal aspect of sharing a cheesy dip encourages conversation, laughter, and a sense of camaraderie that enhances any social occasion.
From football parties to holiday gatherings, cheesy dips like the Cheesy Baked Onion Bliss Dip shine in various settings. They are the epitome of comfort food, combining rich flavors and creamy textures that satisfy the palate. Each scoop of the dip, accompanied by a crispy tortilla chip or a slice of warm baguette, creates a delightful contrast of textures that makes every bite an indulgent experience. This dip encapsulates the essence of shared experiences, transforming simple moments into lasting memories.
Ingredients Breakdown
To craft this Cheesy Baked Onion Bliss Dip, understanding the role of each ingredient is vital. Each component contributes to the overall flavor profile and texture of the dish, ensuring a balanced and delightful eating experience.
– Yellow Onions: The star of the show, yellow onions are known for their natural sweetness. When caramelized, they develop a rich depth of flavor that enhances the dip’s overall profile. This sweetness balances the savory elements, making each bite complex and satisfying.
– Sour Cream: This ingredient adds a creamy texture and a tangy flavor that perfectly offsets the richness of the cheeses. It helps to lighten the dip while providing a smooth mouthfeel that complements the other ingredients.
– Cream Cheese: Essential for achieving that velvety texture, cream cheese contributes a rich creaminess to the dip. It serves as a base that binds the other ingredients together, ensuring a harmonious blend with each scoop.
– Cheddar Cheese: A key player in any cheese dip, sharp cheddar brings both flavor and gooey texture to the mix. Its bold taste creates a delightful contrast to the sweetness of the onions, making it an indispensable part of the dip.
– Parmesan Cheese: Adding a nutty flavor, Parmesan cheese enhances the overall taste of the dip. It melts beautifully and contributes a slightly salty note that rounds out the dish.
– Garlic: The aromatic element in this dip, garlic elevates the flavor profile with its savory depth. It adds a layer of complexity, ensuring that each bite is bursting with flavor.
– Olive Oil: Used for sautéing the onions, olive oil not only helps prevent sticking but also adds healthy fats that enrich the dip. It’s a simple yet essential ingredient that enhances the sautéing process.
– Worcestershire Sauce: This savory sauce introduces umami depth to the dip. Just a splash goes a long way in boosting the flavor, making it an essential addition for those seeking a rich taste.
– Dried Thyme, Salt, and Pepper: Basic seasonings that elevate the dish, dried thyme adds a subtle earthiness, while salt and pepper help to enhance all the other flavors in the dip.
– Cayenne Pepper: For those who enjoy a bit of heat, cayenne pepper is an optional ingredient that offers a spicy kick. It’s a great way to customize the dip to fit your guests’ preferences.
– Chives: Used as a garnish, chives add freshness and a pop of color to the finished dish. Their mild onion flavor complements the dip without overpowering it, making them the perfect finishing touch.
– Tortilla Chips/Baguette: Serving suggestions are essential for a dip. Crispy tortilla chips or slices of warm baguette provide the ideal vehicles for scooping up the cheesy goodness, enhancing the overall experience.
Step-by-Step Instructions
Sautéing the Onions
The first step in creating the Cheesy Baked Onion Bliss Dip is to sauté the yellow onions. This process is crucial for developing the deep, caramelized flavor that will be the foundation of your dip. Here’s how to do it effectively:
1. Preparation: Begin by peeling and slicing your yellow onions into thin, even pieces. The uniformity in size will ensure that they cook evenly.
2. Heating the Pan: Place a large skillet over medium heat and add a drizzle of olive oil. Allow the oil to heat up until it shimmers slightly, indicating it’s ready for the onions.
3. Adding the Onions: Carefully add the sliced onions to the skillet, spreading them out evenly across the pan. This will ensure they cook evenly without overcrowding.
4. Caramelization: Stir the onions occasionally with a wooden spoon, allowing them to cook slowly. The goal here is to let them caramelize, which can take about 15-20 minutes. You want to achieve a golden-brown color, which signifies that the natural sugars in the onions are breaking down and transforming into a sweet, rich flavor.
5. Adjusting Heat: If you notice the onions browning too quickly or starting to stick to the pan, reduce the heat slightly. It’s better to take your time with this step than to rush it, as the caramelization process is key to developing the delicious flavor base for your dip.
This initial step sets the stage for the rest of your dip, so take your time and enjoy the wonderful aroma that fills your kitchen as the onions cook down to perfection. With the onions sautéed to a beautiful caramel color, you can move on to combining them with the creamy, cheesy ingredients that will transform them into a dip everyone will love.
Stay tuned for the next part, where we will delve into mixing the ingredients and the baking process that makes this Cheesy Baked Onion Bliss Dip irresistible!
Tips for Achieving the Perfect Golden-Brown Color
Creating the perfect Cheesy Baked Onion Bliss Dip involves not just the right ingredients, but also achieving that desirable golden-brown crust that signals a deliciously baked dip. Start by ensuring that your oven is properly preheated to 375°F (190°C) before placing your dip inside. This initial heat helps to create that crunchy top layer.
Once you’ve prepared your dip and transferred it to your baking dish, consider broiling the dip for the last few minutes of baking to achieve that stunning golden hue. Keep a close eye on it during this time to prevent burning; just a minute or two under the broiler can make all the difference. Additionally, brushing the top lightly with olive oil or melted butter before baking can enhance browning while adding extra flavor.
Mixing the Ingredients
The foundation of any great dip is how well the ingredients are mixed together. For our Cheesy Baked Onion Bliss Dip, it’s crucial to start with softened cream cheese. This makes it easier to blend with the other ingredients, ensuring a smooth and creamy texture. Take your cream cheese out of the refrigerator about 30 minutes before you start mixing to allow it to soften to room temperature.
When mixing, combine the cream cheese with sautéed onions, sour cream, and any seasoning you choose, such as garlic powder or onion powder. Make sure to mix thoroughly to ensure that every bite is packed with flavor. You want to avoid any pockets of unblended cream cheese or onions, as these could lead to uneven flavor distribution in the finished dip.
Incorporating the Cheeses
After you’ve successfully blended your base, it’s time to fold in the cheeses. The key here is to be gentle so that you maintain a rich texture. Add your shredded cheeses—typically a combination of sharp cheddar and mozzarella for a delightful melt—and use a spatula to fold them into the mixture. This technique keeps the air in the dip, giving it a lighter consistency and enhances the overall mouthfeel.
Don’t hesitate to experiment with different cheese varieties! For a bolder flavor, consider adding smoked gouda or pepper jack. For a creamier dip, try incorporating some cream cheese or ricotta. The world of cheese is vast, and each option can elevate your dip in unique ways.
Preparing for Baking
Before sliding your dip into the oven, ensure that your oven is preheated. An evenly heated oven is essential for achieving consistent cooking results. It allows the dip to heat through uniformly, producing that perfect blend of creamy and bubbly goodness.
When it comes to choosing a baking dish, opt for one that is shallow and wide. A wider surface area helps the dip to bake evenly, promoting better browning on top. A ceramic or glass dish is ideal, as these materials retain heat well and contribute to even cooking.
Baking Process
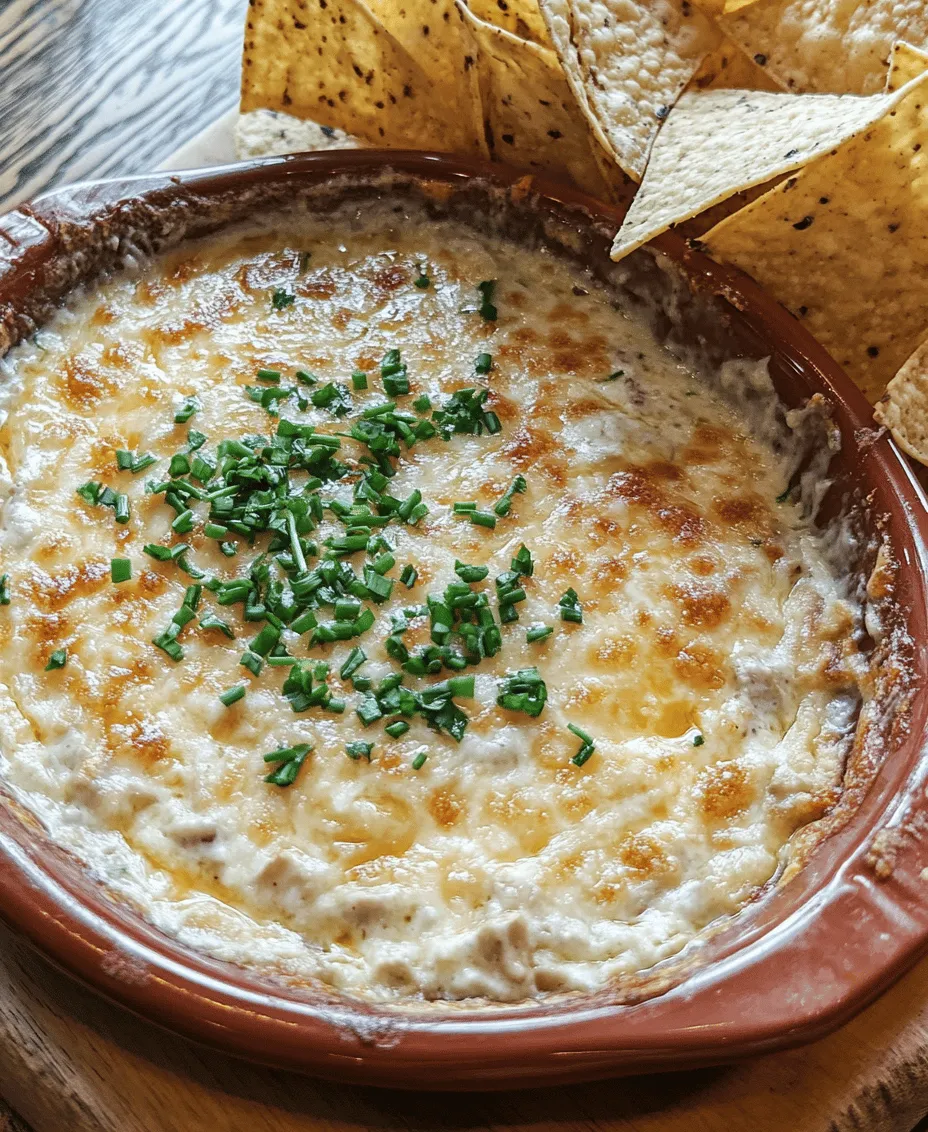
As your Cheesy Baked Onion Bliss Dip bakes, keep an eye on it. You’ll want to look for a bubbly surface and a golden-brown crust, which usually takes about 25-30 minutes at 375°F (190°C). If you’ve opted to broil it, make sure to watch it closely, as it can quickly go from perfectly browned to burnt in just a matter of seconds.
Once it reaches that glorious bubbling and browning stage, remove the dip from the oven and allow it to cool slightly. This resting period is crucial; it helps the dip set, making it easier to scoop and serve while also preventing burns from the hot cheese.
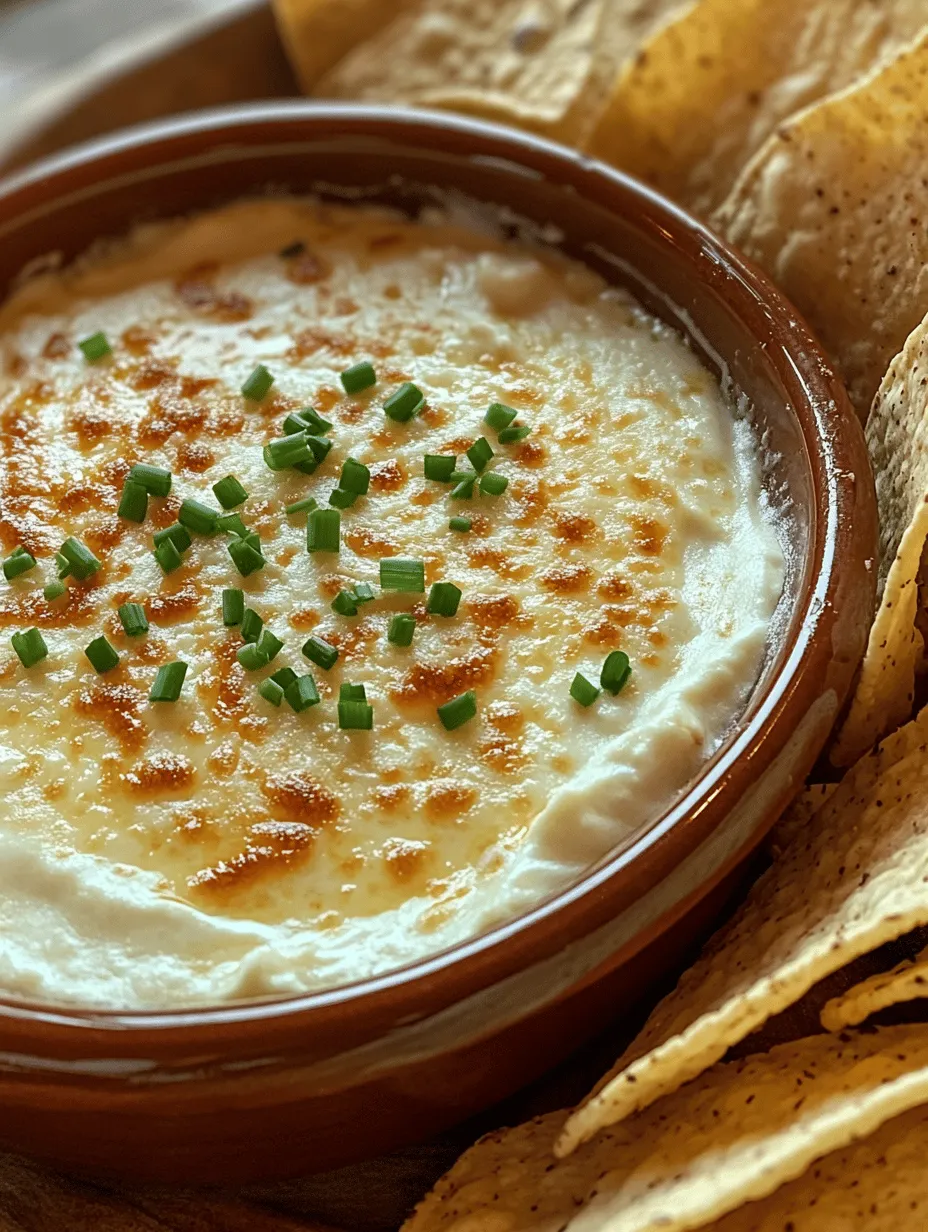
Garnishing and Serving
Garnishing your dip not only enhances its visual appeal but also adds an extra layer of flavor. Fresh chives are an excellent choice for this recipe; their mild onion flavor complements the dip beautifully. Simply chop them finely and sprinkle them on top just before serving. You might also consider adding a sprinkle of paprika or crushed red pepper for a pop of color and a hint of heat.
For serving options, consider an array of dippers to accompany your dip. Fresh vegetable sticks such as carrots, celery, and bell peppers add a refreshing crunch. Pita chips and tortilla chips are also fantastic options for dipping. For a more substantial appetizer, serve the dip warm alongside toasted baguette slices or crackers. Arrange everything on a large platter for a visually appealing spread that invites guests to dig in.
Nutritional Information
When enjoying Cheesy Baked Onion Bliss Dip, it’s useful to be aware of its nutritional profile. A typical serving (about 1/4 cup) contains approximately 250 calories, with 20 grams of fat and 10 grams of protein, depending on the specific types of cheese and additional ingredients used.
Portion size is key. While it’s easy to indulge, keeping servings moderate allows everyone to enjoy the dip without overdoing it. If you’re looking for dietary modifications, consider using low-fat cream cheese and reduced-fat sour cream to lower the calorie count without sacrificing too much flavor.
Pairing Suggestions
To elevate your dipping experience, consider beverage pairings that complement the rich flavors of your Cheesy Baked Onion Bliss Dip. A crisp, chilled white wine, such as Sauvignon Blanc, pairs beautifully, cutting through the creaminess of the dip. For beer lovers, a light lager or a refreshing pale ale can provide a delightful balance. If you prefer non-alcoholic options, sparkling water with a splash of lemon or a fruity iced tea can refresh the palate.
In terms of complementary foods, consider serving your dip alongside a charcuterie board filled with cured meats, cheeses, and olives. This adds variety to your appetizer spread and enhances the overall flavor experience.
Conclusion
Sharing your Cheesy Baked Onion Bliss Dip at gatherings is sure to bring joy to your friends and family. Its comforting, creamy texture and rich flavors make it an instant crowd-pleaser, perfect for any occasion.
With simple preparation steps and the ability to customize flavors, this dip is not only easy to make but also a delightful treat that everyone will love. We encourage you to try this recipe and make it a staple for your events—once you do, you’ll surely find it hard to resist whipping it up again and again!