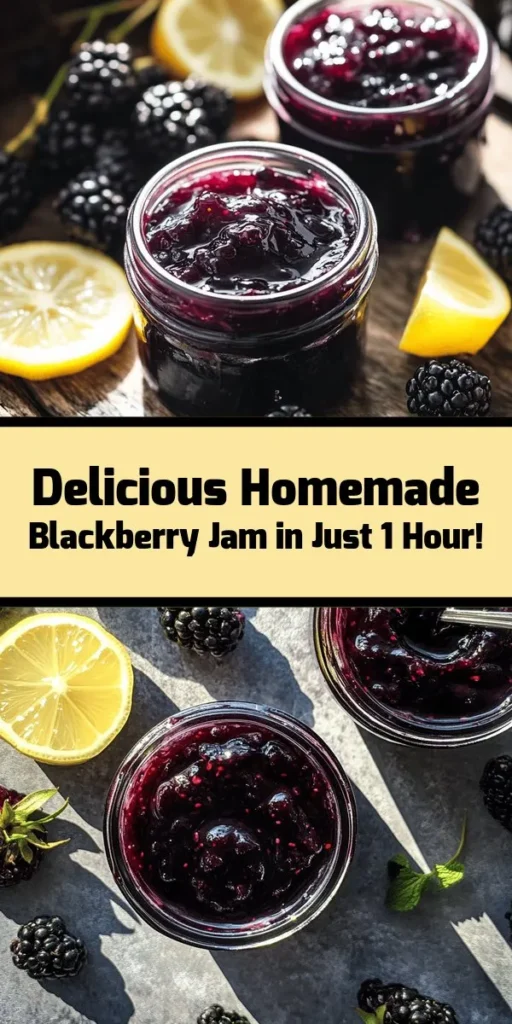
Introduction
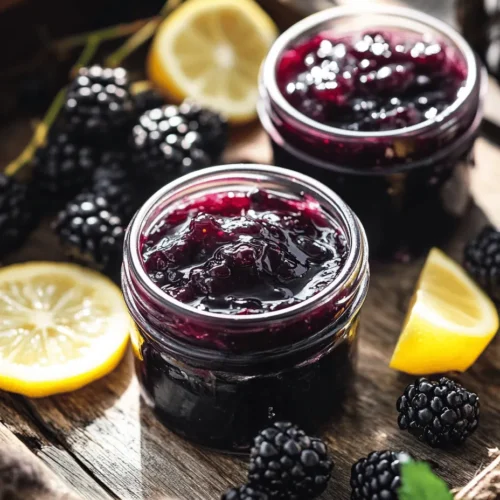
There’s something undeniably delightful about homemade fruit preserves. Whether it’s the luscious spread on a warm biscuit, a topping for pancakes, or a sweet addition to yogurt, homemade jams encapsulate the essence of fresh fruits, capturing their vibrant flavors at their peak. Among the myriad of fruits that lend themselves beautifully to jam-making, blackberries stand out with their rich, sweet-tart flavor and deep purple hue. Making blackberry jam at home is not only a rewarding experience but also a way to preserve the fleeting taste of summer, allowing you to enjoy the delightful essence of this berry year-round.
The key to crafting the best blackberry jam lies in the quality of the ingredients. Using fresh, ripe blackberries is crucial for achieving the most intense flavor. When combined with just the right amount of sugar and a splash of lemon juice, you’ll find that this simple recipe is both easy to follow and incredibly rewarding. In this article, we’ll explore the nutritional benefits of blackberries, provide essential tips for selecting the best fruit, and guide you step-by-step through the jam-making process. Get ready to create a delicious spread that is as versatile as it is delightful!
Understanding Blackberries
Nutritional Benefits of Blackberries
Blackberries are not just a delicious addition to your kitchen; they are also packed with nutrients that contribute to overall health. These succulent berries are rich in vitamins C and K, providing essential antioxidants that help combat oxidative stress and support your immune system. One cup of blackberries contains approximately 62 calories, making them a low-calorie snack option. They are also high in dietary fiber, promoting digestive health and aiding in weight management. With their high water content and natural sugars, blackberries make for a refreshing treat that can satisfy your sweet tooth without the guilt.
Flavor Profile and Culinary Uses
Blackberries possess a complex flavor profile that balances sweetness with a hint of tartness. This makes them an excellent choice for a variety of culinary applications. Beyond jam-making, blackberries can be used in desserts like pies and cobblers, incorporated into salads for a burst of flavor, or blended into smoothies for a nutritious drink. Their versatility allows them to shine in both sweet and savory dishes, making them a favorite among chefs and home cooks alike.
Tips for Selecting the Best Blackberries at the Market
When it comes to making the best blackberry jam, the quality of your blackberries is paramount. Here are some tips to help you choose the ripest, most flavorful berries:
1. Look for a Deep Color: Choose berries that are deep purple to black in color. Avoid those that are red or green, as they are under-ripe and will not provide the desired flavor.
2. Check for Firmness: The berries should be plump and firm to the touch. Soft or squishy berries may be overripe and can affect the quality of your jam.
3. Inspect for Mold: Always check for signs of mold or spoilage. A few damaged berries can spoil a whole batch, so it’s best to choose containers with intact fruit.
4. Smell the Berries: Ripe blackberries will emit a sweet, fragrant aroma; this is a good indicator of their ripeness and flavor.
5. Buy Local and In-Season: If possible, purchase blackberries from local farmers’ markets during their peak season. This not only supports local agriculture but also ensures you’re getting the freshest berries available.
Essential Ingredients for Blackberry Jam
Creating the perfect blackberry jam requires just a few simple ingredients. Each plays a vital role in achieving the desired texture and flavor profile. Let’s take a closer look at each component:
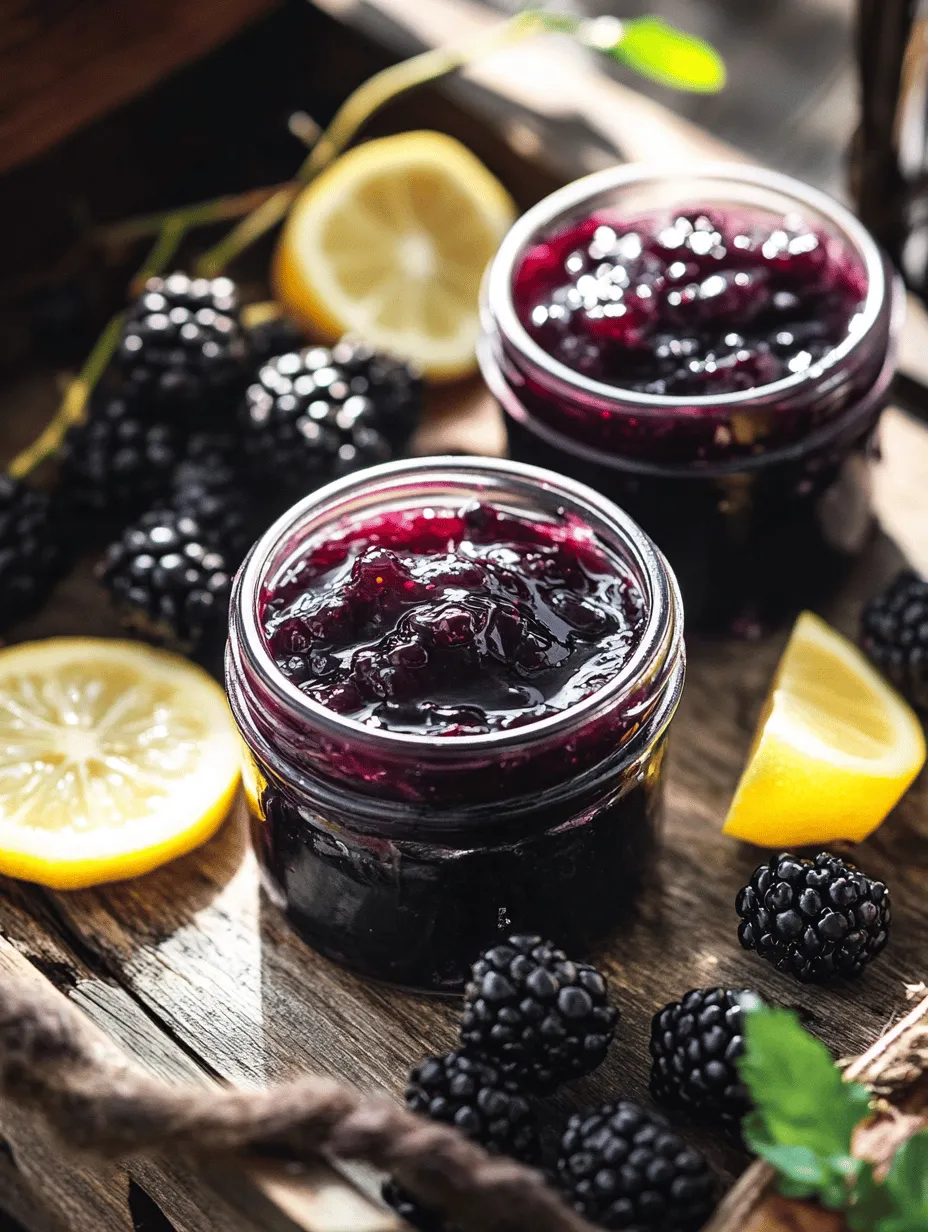
Fresh Blackberries
The star of the show is, of course, the blackberries. Fresh, ripe blackberries are essential for a rich flavor and vibrant color. Look for berries that are plump and deeply colored. The ripeness of the berries will directly affect the sweetness of your jam, so aim for those that are fully mature and bursting with flavor. If you can’t find fresh blackberries, you may use frozen ones, but be sure to thaw them completely and drain excess liquid before use.
Granulated Sugar
Sugar is a crucial ingredient in jam-making, serving two primary purposes: sweetening and preservation. It helps to balance the tartness of the blackberries, enhancing their natural flavor. Additionally, sugar acts as a preservative, prolonging the shelf life of your jam. The amount of sugar can vary based on your taste preference and the natural sweetness of the berries, but for a traditional blackberry jam, a 1:1 ratio of sugar to fruit is commonly used.
Fresh Lemon Juice
Adding fresh lemon juice is essential for bringing brightness to the jam. The acidity of the lemon juice not only enhances the flavor of the blackberries but also helps to create the right balance for a well-rounded jam. Moreover, lemon juice aids in the gelling process, ensuring that your jam sets properly. Always opt for fresh lemon juice over bottled varieties for the best flavor.
Fruit Pectin
Pectin is a naturally occurring substance found in fruits that helps to thicken and gel the jam. While blackberries contain some pectin, adding additional fruit pectin ensures a proper set. There are various types of pectin available, including liquid and powder forms. If you prefer a low-sugar jam, there are pectin options specifically designed for that purpose. If you want to avoid pectin altogether, you can cook the jam longer to achieve a thicker consistency, but this may alter the flavor slightly.
Optional Butter
While not necessary, a small amount of unsalted butter can be added to the jam during cooking. This helps reduce foam and creates a clearer final product. If you prefer a cleaner appearance for your jam, consider adding a tablespoon of butter to the mixture.
Preparation Steps Explained
Now that we’ve covered the essential ingredients, let’s move on to the preparation steps involved in making homemade blackberry jam. This section will provide you with detailed instructions to ensure your jam turns out perfectly every time.
Preparing the Blackberries
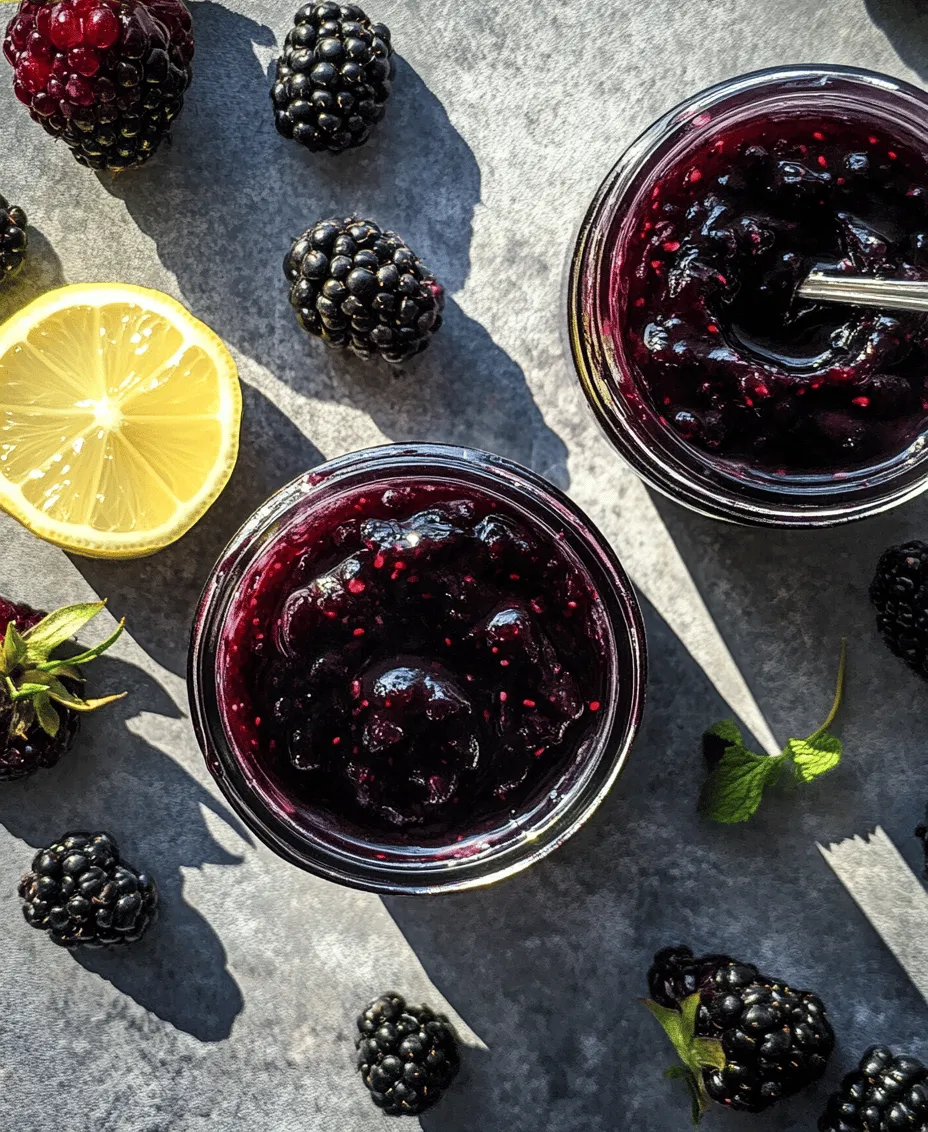
The first step in making your blackberry jam is preparing the fruit. Start by rinsing the blackberries under cold water to remove any dirt or debris. Be gentle while washing to avoid crushing the berries, as they are delicate.
After rinsing, it’s time to mash the blackberries. You can use a potato masher or a fork to do this. If you prefer a smoother jam, mash the berries until they are mostly puréed. For a chunkier consistency, leave some whole berries intact. The choice is yours, depending on your texture preference.
Combining Ingredients
Once the blackberries are prepared, it’s time to combine them with the other ingredients. In a large mixing bowl, add your mashed blackberries, granulated sugar, and fresh lemon juice. Stir the mixture gently to combine, ensuring the sugar begins to dissolve. This step is important, as allowing the mixture to sit for about 10-15 minutes will help extract more flavor from the blackberries and enhance the overall taste of your jam.
Cooking the Mixture
After letting the mixture sit, it’s time to cook it. Pour the blackberry mixture into a large, heavy-bottomed pot. Place the pot over medium heat and bring the mixture to a gentle boil, stirring frequently. It’s important to monitor the mixture closely, as it can bubble up and splatter. Once it reaches a rolling boil, continue cooking for about 10-15 minutes. You’ll want to keep stirring to prevent sticking and ensure even cooking.
As the mixture cooks, you may notice foam forming on the surface. If you added butter, this foam should be minimal. If not, you can skim the foam off with a spoon for a clearer jam.
Keep an eye on the consistency of your jam. To determine if it’s ready for canning, you can perform the “plate test.” Take a small spoonful of the jam and place it on a cold plate. Allow it to sit for a minute, then run your finger through it. If it holds its shape and doesn’t run back together, it’s ready to be removed from the heat.
With the initial preparation steps complete, you’re well on your way to creating a delightful homemade blackberry jam that you can enjoy throughout the year. Stay tuned for the continuation of this recipe, where we’ll delve into the canning process and tips for storing your jam effectively.
Cooking Time and Consistency
When it comes to creating the perfect homemade blackberry jam, patience is key. The cooking time typically ranges between 15 to 30 minutes after the mixture reaches a boil. The exact duration can vary based on factors such as the juiciness of the blackberries and the heat of your stovetop. It’s crucial to monitor the consistency closely as this will dictate whether the jam is ready to be preserved.
Testing for Doneness
To ensure your blackberry jam is ready for jarring, you’ll want to test its doneness through a couple of reliable methods.
1. Cold Plate Test: This is a classic method used by many home canners. To perform the cold plate test, you need to have a plate that has been chilled in the freezer for about 15 minutes. Once your jam has reached a rolling boil, take a spoonful of the mixture and place it on the cold plate. Wait for about 30 seconds, then run your finger through the jam. If it holds its shape and you can see your finger’s path, the jam is ready. If it still looks runny and flows back together, it needs more time on the heat.
2. Thermometer Check: If you prefer a more precise method, use a candy thermometer. For most fruit jams, you’re looking for a temperature of 220°F (104°C) at sea level. Keep in mind that the boiling point of water decreases with altitude, so adjust accordingly if you’re at a higher elevation.
Signs That Indicate the Jam Needs More Time
If your jam isn’t holding its shape during the cold plate test or hasn’t reached the desired temperature, it’s likely not done. Watch for these signs indicating that it needs more cooking time:
– The mixture appears watery or too liquid-like.
– The bubbles in the jam are large and slow-moving rather than small and rapid.
– The color is still too bright or not deepened to the rich purple typical of set jam.
Finishing Touches
Once your blackberry jam reaches the right consistency, it’s time for the finishing touches.
Optional Addition of Butter
Some recipes call for adding a tablespoon of unsalted butter to the jam before jarring. This is optional, but it serves a dual purpose: it helps to reduce the foaming that can occur during cooking and adds a silky texture to the final product. If you choose to include it, stir the butter in just before you take the jam off the heat and allow it to melt completely.
Step-by-Step Guide to Jarring the Jam
Before you begin jarring, prepare your canning jars and lids by sterilizing them. This is crucial for food safety. You can do this by boiling them in water for 10 minutes or running them through the dishwasher on a hot cycle.
1. Carefully ladle the hot jam into each sterilized jar, leaving about 1/4-inch headspace at the top. This space is vital for the expansion of the jam during processing.
2. Wipe the rims of the jars with a clean, damp cloth to remove any residue that could prevent a proper seal.
3. Place the sterilized lids on each jar and screw the metal bands on until they are fingertip-tight.
Importance of Sterilization for Food Safety
Sterilizing jars and lids is essential in ensuring that your homemade blackberry jam is safe to eat. This process eliminates any bacteria, yeasts, or molds that could spoil the jam or lead to foodborne illnesses.
Tips for Leaving the Correct Headspace in Jars
The headspace refers to the empty space between the food and the lid of the jar. Leaving the correct amount of headspace (typically 1/4 inch for jam) allows for expansion during processing and creates a vacuum seal as the jars cool. Too little headspace can lead to overflow during the boiling process, while too much can prevent a proper seal.
Canning and Sealing Techniques
To extend the shelf life of your homemade blackberry jam, it’s essential to follow proper canning and sealing techniques.
Overview of the Sealing Process for Longer Shelf Life
Once your jars are filled and lids are secured, they need to be processed in a boiling water bath. This step not only seals the jars but also ensures that any remaining bacteria are killed, allowing the jam to be safely stored at room temperature.
Detailed Instructions on Processing Jars in a Boiling Water Bath
1. Fill a large canning pot with enough water to cover the jars by at least an inch.
2. Bring the water to a rolling boil before placing the jars inside.
3. Process the jars in boiling water for about 5 to 10 minutes. The time may vary based on your altitude and the size of your jars.
4. After processing, carefully remove the jars from the water using a jar lifter and place them on a clean towel or cooling rack.
How to Safely Handle Hot Jars Post-Processing
Be cautious when handling hot jars. Always use jar lifters and wear protective gloves or mitts if necessary. Place the jars upright and avoid moving them for at least 12 hours to ensure proper sealing.
Cool Down and Storage
Once the jars have cooled, it’s essential to check the seals and store them properly for maximum flavor retention.
Best Practices for Cooling and Checking Jar Seals
Leave the jars undisturbed at room temperature for at least 12 hours. After this period, check the seals by pressing the center of each lid. If the lid pops back, the jar did not seal correctly and should be refrigerated and consumed within a few weeks. If it remains depressed, you have a good seal.
Recommendations for Storing Jam for Optimal Flavor Retention
Store your sealed jars in a cool, dark place, such as a pantry or cupboard. Properly sealed blackberry jam can last up to a year. For the best flavor and freshness, try to consume it within six months.
Explanation of How to Handle Unsealed Jars
If you discover that some jars did not seal, don’t panic. Refrigerate the unsealed jars immediately and enjoy the jam within a few weeks. You can also reprocess them by following the same jarring and sealing process again.
Creative Uses for Blackberry Jam
Homemade blackberry jam is not just for spreading on toast! There are numerous creative ways to incorporate this delicious jam into your meals and snacks.
Ideas for Incorporating Jam into Meals and Snacks
1. Breakfast Boost: Spread blackberry jam on warm toast, pancakes, or waffles for a sweet start to your day.
2. Dessert Delight: Use it as a filling for pastries, cookies, or layer it in desserts like trifles and cheesecakes.
3. Savory Pairing: Combine blackberry jam with savory dishes. It works wonderfully as a glaze for roasted meats or as part of a sauce for grilled chicken.
Pairing Suggestions with Cheeses and Meats
Blackberry jam pairs exceptionally well with a variety of cheeses, such as brie, goat cheese, or sharp cheddar. It can also complement cured meats like prosciutto or salami, adding a touch of sweetness to your charcuterie board.
Conclusion
Making homemade blackberry jam is a rewarding experience that captures the essence of summer in every jar. The process may require some time and attention, but the end result—a deliciously sweet and tart jam—is well worth the effort. Not only do you get to enjoy the flavors of ripe blackberries, but you also gain the satisfaction of preserving seasonal fruits right in your kitchen.
As you continue your jam-making journey, don’t hesitate to experiment with different fruit combinations or even add herbs and spices to create unique flavors. The joy of crafting your own preserves awaits, so gather your ingredients, follow the steps, and relish the fruits of your labor!