Introduction
There’s something undeniably joyous about making homemade pizza. The scent of freshly baked bread, the sight of bubbling cheese, and the ability to customize every topping to your liking all contribute to a truly satisfying culinary experience. However, the foundation of a great pizza lies in its dough. A well-crafted dough not only provides the structure for the toppings but also contributes significantly to the overall flavor and texture of the finished product.
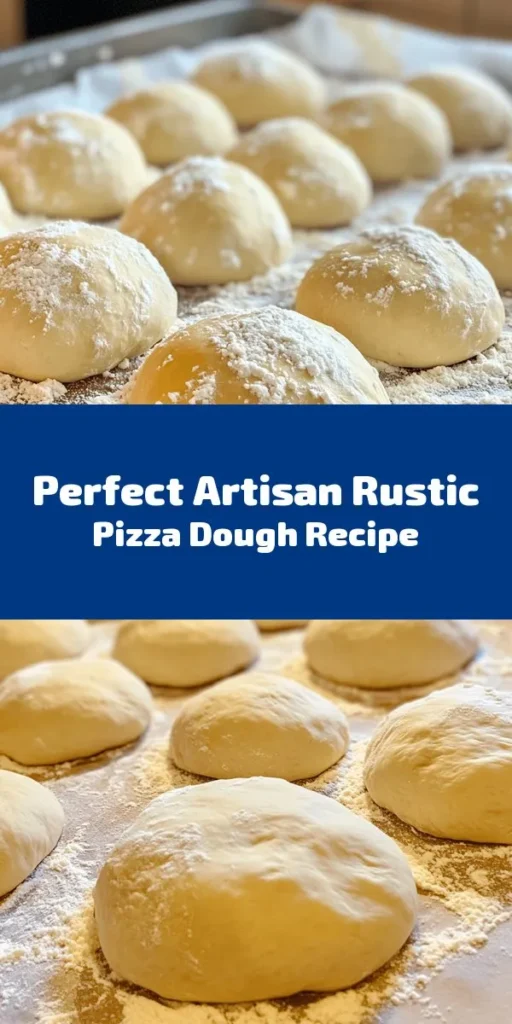
In this article, we will introduce you to the Artisan Rustic Pizza Dough recipe, a simple yet authentic approach to creating the perfect base for your homemade pizzas. With just a handful of ingredients and a few straightforward steps, you’ll be able to craft a delicious, crusty dough that elevates your pizza game. Whether you’re a novice cook or a seasoned chef, this recipe will guide you through the process of making pizza dough that is both easy to prepare and incredibly rewarding.
The Art of Pizza Making
To truly appreciate the Artisan Rustic Pizza Dough, it’s essential to understand the rich history and evolution of pizza itself. Originating in Naples, Italy, pizza began as a humble flatbread, often topped with simple ingredients such as olive oil, garlic, and cheese. Over the years, it has transformed into a global phenomenon, with countless variations and styles that reflect local tastes and ingredients. From the thin, crispy crust of a Neapolitan pizza to the thick, doughy base of Chicago-style deep dish, the evolution of pizza is a testament to its versatility and universal appeal.
One of the key components of making authentic pizza is the use of quality ingredients. The best pizzas are made from fresh, high-quality elements that contribute to the overall flavor. This recipe emphasizes the importance of selecting the right ingredients, each playing a critical role in achieving that perfect crust. Additionally, the beauty of pizza lies in its endless creative possibilities. You can explore various toppings, sauces, and cheeses, allowing you to express your culinary creativity while satisfying different palates.
Understanding the Ingredients
Before we dive into the step-by-step guide of making Artisan Rustic Pizza Dough, let’s take a closer look at the essential ingredients that will form the backbone of your dough.
All-Purpose Flour: Texture and Structure
All-purpose flour is the cornerstone of any pizza dough. It provides the necessary structure and texture, allowing the dough to rise properly while remaining chewy and tender. The protein content in all-purpose flour helps develop gluten, which contributes to the dough’s elasticity and strength. For those seeking a more artisanal touch, consider using a blend of bread flour and all-purpose flour to achieve a chewier crust.
Sea Salt: Flavor Enhancement
Sea salt is not just a seasoning; it plays a crucial role in enhancing the flavor of your pizza dough. Salt helps to control yeast fermentation, ensuring that the dough rises evenly while also adding depth to the overall flavor profile. When using sea salt, aim for a fine grain so it distributes evenly throughout the dough.
Instant Yeast: Leavening Agent and Fermentation Process
Instant yeast is a convenient leavening agent that allows your dough to rise quickly. Unlike active dry yeast, instant yeast can be mixed directly with the dry ingredients without the need for proofing. This saves time and simplifies the process. Yeast is responsible for fermentation, producing carbon dioxide that helps the dough rise and develop flavor. It’s essential to store your yeast properly in a cool, dry place to maintain its effectiveness.
Warm Water: Activating Yeast and Moisture Balance
Warm water is a critical component in activating the yeast, kickstarting the fermentation process. The ideal temperature for the water should be between 100°F to 110°F (38°C to 43°C). Too hot, and you risk killing the yeast; too cold, and the yeast may not activate properly. The right balance of moisture is also crucial for achieving the perfect dough consistency, ensuring that the dough is neither too dry nor too sticky.
Olive Oil: Optional Flavor Enhancer and Dough Texture
While olive oil is optional in this recipe, it can enhance the flavor and texture of your dough. Adding olive oil creates a softer, more tender crust and contributes a rich, fruity flavor. When using olive oil, opt for high-quality extra virgin olive oil to elevate the taste of your dough.
Cornmeal: Preventing Sticking and Adding Texture
Cornmeal is often used as a dusting agent to prevent the dough from sticking to your work surface or pizza peel. It adds a delightful crunch to the crust when baked. You can also use semolina or flour as alternatives, but cornmeal provides a unique texture that complements the rustic nature of this pizza dough.
Tips for Selecting High-Quality Ingredients
– Flour: Look for unbleached, organic all-purpose flour for the best flavor and texture.
– Salt: Choose coarse sea salt or kosher salt for a more nuanced taste.
– Yeast: Check the expiration date on your package of yeast to ensure its potency.
– Water: If possible, use filtered or spring water for the best taste.
– Olive Oil: Invest in a good quality extra virgin olive oil, as it significantly impacts the dough’s flavor.
Step-by-Step Guide to Making Artisan Rustic Pizza Dough
Now that we’ve explored the essential ingredients, it’s time to dive into the process of making your Artisan Rustic Pizza Dough. The following steps will guide you through mixing, kneading, and preparing your dough for its delicious transformation into a homemade pizza.
Mixing the Dry Ingredients
1. Gather Your Ingredients: Start by measuring out your all-purpose flour and sea salt. For a basic recipe, you will need approximately 4 cups of all-purpose flour and 2 teaspoons of sea salt.
2. Combine the Dry Ingredients: In a large mixing bowl, add the measured flour and salt. Using a whisk, mix the two ingredients together until they are well combined. Whisking is crucial for achieving uniformity, as it helps to distribute the salt evenly throughout the flour.
3. Visual Cues for Combining: The flour and salt mixture should appear consistent without any visible clumps. Once you’ve whisked them together thoroughly, you can move on to the next step.
Adding Warm Water
1. Prepare the Warm Water: Measure out 1.5 cups of warm water (between 100°F to 110°F). If you don’t have a thermometer, test the water with your finger; it should feel warm but not hot to the touch.
2. Incorporate Water into the Dry Mixture: Create a well in the center of the dry ingredients, then slowly pour the warm water into the well. Using a wooden spoon or a spatula, gently stir the mixture, starting from the inside of the well and working your way outward. This helps to gradually incorporate the flour into the water.
3. Achieving the Right Dough Consistency: As you mix, the dough will begin to come together. You’re looking for a slightly sticky but manageable consistency. If the dough feels too dry, add a little more warm water, one tablespoon at a time, until you reach the desired texture.
Kneading the Dough
1. Prepare Your Surface: Lightly flour a clean work surface to prevent the dough from sticking. Transfer the dough onto the floured surface.
2. Knead the Dough: Begin kneading the dough by pushing it down and away from you with the heel of your hand. Fold the dough over itself, give it a quarter turn, and repeat the process. Kneading is vital for developing gluten, which gives the dough its structure and elasticity. Continue kneading for about 8-10 minutes until the dough is smooth and elastic.
3. Visual Cues for Kneading: The dough should become less sticky and more cohesive as you knead. It should spring back when lightly pressed and have a smooth surface. If the dough feels too sticky, sprinkle a little flour on your surface, but be careful not to add too much, as this can lead to a dry dough.
With these initial steps, you’re well on your way to creating a delicious Artisan Rustic Pizza Dough. Stay tuned for the next part, where we will discuss how to let the dough rise, shape it, and prepare it for baking, ensuring you achieve that perfect homemade pizza experience.
Techniques for Effective Kneading
Kneading is a crucial step in developing the gluten structure in your artisan rustic pizza dough, which ultimately contributes to the texture and chewiness of the crust. You can knead the dough either by hand or using a stand mixer, each method offering its own benefits.
Hand Kneading
When kneading by hand, start by pressing the dough with the palms of your hands, pushing it away from you. Fold it in half, rotate it 90 degrees, and repeat the process. This method allows you to feel the dough’s elasticity and adjust your technique as necessary. Ideally, knead for about 8 to 10 minutes until the dough becomes smooth and elastic.
Stand Mixer
Using a stand mixer with a dough hook can save you time and energy. Combine your ingredients in the mixer bowl and mix on low speed until the dough begins to form. Increase the speed to medium and knead for about 5 to 7 minutes. Pay attention to the dough’s consistency; it should pull away from the sides of the bowl but still feel slightly tacky to the touch.
Signs That Dough Is Ready
Knowing when your dough is ready is essential for a successful rise and ultimately, a great pizza crust. The dough should be smooth, elastic, and slightly tacky. Conduct the “windowpane test” by stretching a small piece of dough between your fingers; if it creates a thin translucent membrane without tearing, you’re good to go.
The First Rise
After kneading, it’s time for the first rise, also known as bulk fermentation. This phase is crucial for developing flavor and texture in your dough. Place the kneaded dough in a lightly greased bowl, cover it with a damp cloth or plastic wrap, and set it in a warm, draft-free location. Let it rise for about 1 to 2 hours or until it has doubled in size.
Explanation of the Fermentation Process
During fermentation, yeast consumes sugars in the flour and produces carbon dioxide and alcohol. The carbon dioxide gas creates air pockets in the dough, which contribute to its light and airy structure. Additionally, the longer the dough ferments, the more flavorful it becomes due to the development of organic acids.
Ideal Conditions for Dough Rising
For optimal dough rising, aim for a warm and humid environment. The ideal temperature for yeast activity is around 75-85°F (24-29°C). If your kitchen is cool, consider placing the dough in an oven with the light on, or near a radiator. If you live in a humid climate, the natural moisture can aid the rising process.
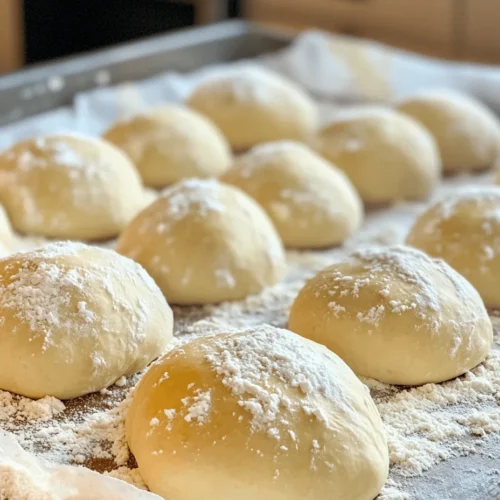
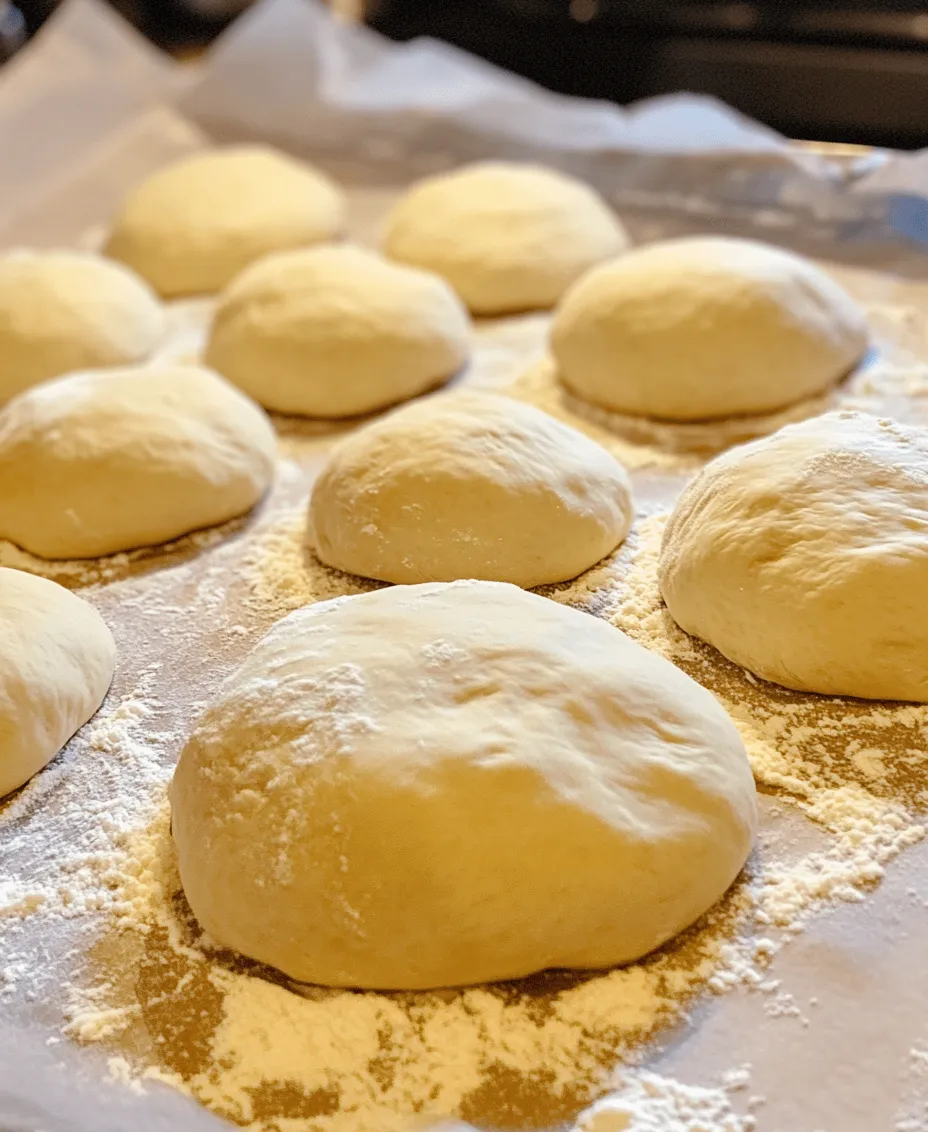
Shaping the Dough
Once the dough has completed its first rise, it’s time to shape it. Begin by gently deflating the dough to release excess gas. Divide the dough into equal portions, typically 2 or 4, depending on the size of pizzas you’d like to make. Use a bench scraper or knife for a clean cut.
Techniques for Dividing and Shaping the Dough
To shape the dough into balls, take one portion, gather the edges toward the center, and pinch them together. Flip it over seam-side down and use your palm to gently roll it against the counter until it forms a smooth ball. Repeat this process for each portion.
Importance of Rest Period for Gluten Relaxation
After shaping, let the dough balls rest for about 20-30 minutes, covered with a damp cloth. This resting period allows the gluten to relax, making it easier to stretch the dough later without it springing back.
Preparing for Baking
Before baking your pizza, preparation is key to achieving that perfect crust.
Preheating the Oven and Pizza Stone
Preheat your oven to its highest setting, typically around 475-500°F (245-260°C), at least 30 minutes before you plan to bake. If you’re using a pizza stone, place it in the oven during preheating. The stone absorbs heat and helps create a crispy crust by removing moisture from the dough.
Why a Hot Oven is Crucial for a Crispy Crust
A hot oven ensures that the pizza cooks quickly and evenly, allowing the crust to puff up and develop a beautiful golden-brown color. The high temperature also creates a Maillard reaction, enhancing the crust’s flavor and texture.
Alternative Methods for Those Without a Pizza Stone
If you don’t have a pizza stone, don’t worry! You can use an inverted baking sheet placed in the oven during preheating. When ready to bake, transfer your pizza onto the heated baking sheet to achieve a similar effect.
Rolling Out the Dough
Once your dough has rested, it’s time to roll it out.
Techniques for Achieving the Desired Thickness and Shape
Flour your work surface and your rolling pin to prevent sticking. Start from the center of the dough ball and roll outward, turning the dough as you go to maintain a circular shape. Aim for a thickness of about ¼ inch for a classic pizza crust. However, if you prefer a thicker crust, adjust accordingly.
Tips for Maintaining Thicker Edges for a Crusty Border
To achieve a crusty border, leave the outer edge of the dough slightly thicker than the center. You can also create a small lip around the edge by pinching it gently with your fingers. This will help trap air and create a delightful crust.
Creative Topping Ideas
Now comes the fun part—topping your pizza!
Overview of Classic Pizza Toppings and Their Flavor Profiles
Classic toppings include pepperoni, mozzarella cheese, bell peppers, mushrooms, and onions. Each of these toppings brings its own unique flavor and texture. For example, pepperoni adds a spicy kick, while mozzarella provides a creamy, melty base.
Suggestions for Unique and Gourmet Toppings to Elevate Your Pizza
For a gourmet twist, consider using toppings like prosciutto, arugula, goat cheese, or roasted garlic. A drizzle of balsamic glaze or a sprinkle of truffle oil can also add a touch of sophistication.
Importance of Balancing Flavors and Textures in Toppings
When selecting toppings, think about how the flavors and textures will work together. Aim for a balance of savory, sweet, and tangy elements, as well as a mix of soft and crunchy textures to keep each bite interesting.
Baking Your Pizza
With your pizza assembled, it’s time to bake!
Best Practices for Transferring Pizza to the Oven
To transfer your pizza to the oven, use a pizza peel or a flat baking sheet sprinkled with flour or cornmeal to help prevent sticking. Gently slide the pizza onto the hot stone or baking sheet in the oven.
Baking Times and Visual Indicators for a Perfect Crust
Bake your pizza for about 10-15 minutes, or until the crust is golden brown and the cheese is bubbly and slightly browned. Keep an eye on it; ovens can vary, and you don’t want to risk burning your masterpiece.
Importance of Letting the Pizza Cool Before Slicing
Once your pizza is done baking, allow it to cool for a few minutes before slicing. This resting time helps the cheese set slightly, preventing it from sliding off when you cut into the pizza.
Conclusion
Making artisan rustic pizza dough at home is a rewarding experience that brings joy to both the cook and those who get to enjoy the delicious results. The satisfaction of kneading your dough, watching it rise, and then baking your very own pizza is unparalleled.
Don’t hesitate to experiment with different toppings and variations to create personalized pizzas that cater to your taste. Involve your friends and family in the process, making pizza night a fun and interactive experience. Share your culinary creations, and enjoy the process of making homemade pizza—it’s an adventure worth savoring!