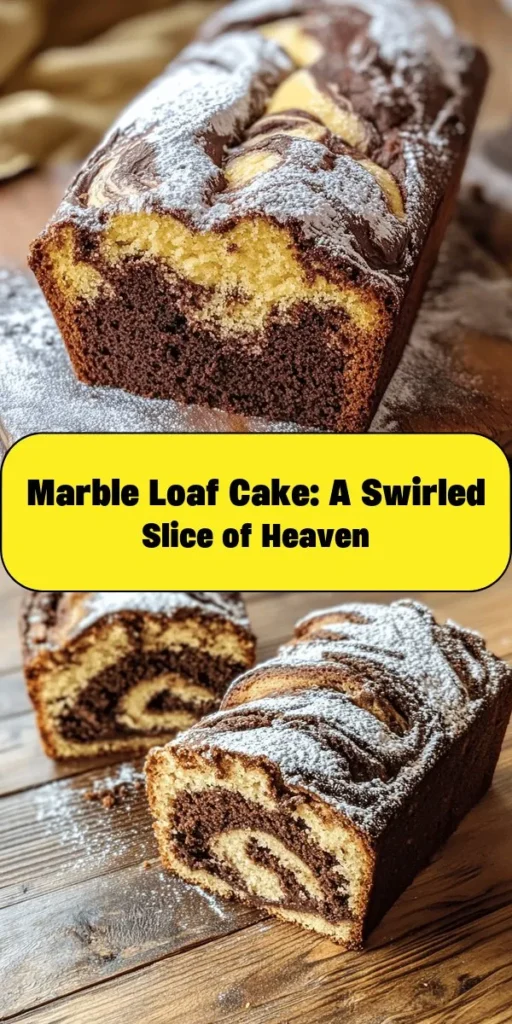
Introduction
Welcome to the world of delightful baking where flavors and aesthetics intertwine to create a visual and gustatory masterpiece. Today, we’re diving into the recipe for the Swirled Delight Marble Loaf Cake, a treat that effortlessly combines the rich, indulgent flavors of chocolate with the light, comforting notes of vanilla. This cake is not just a dessert; it’s an experience that elevates any occasion, be it a casual afternoon tea or a festive celebration.
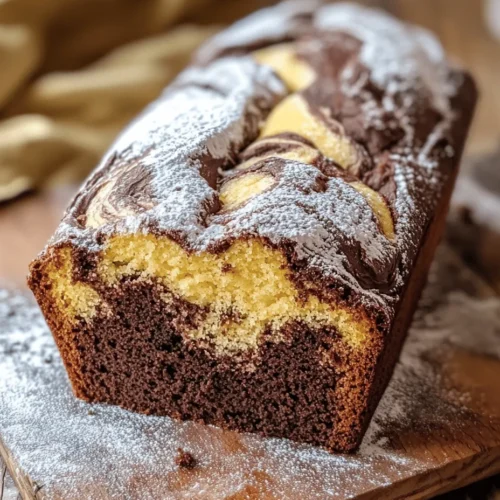
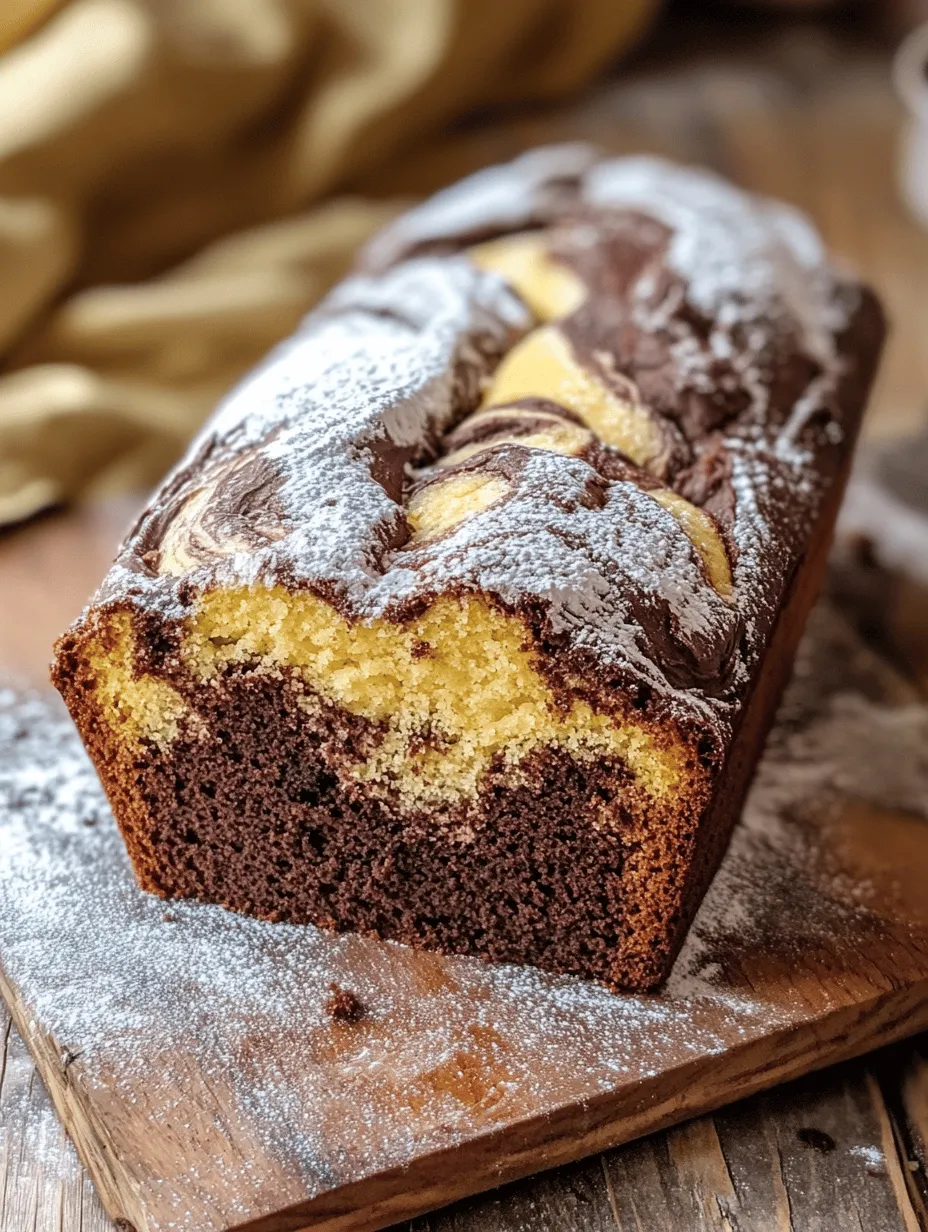
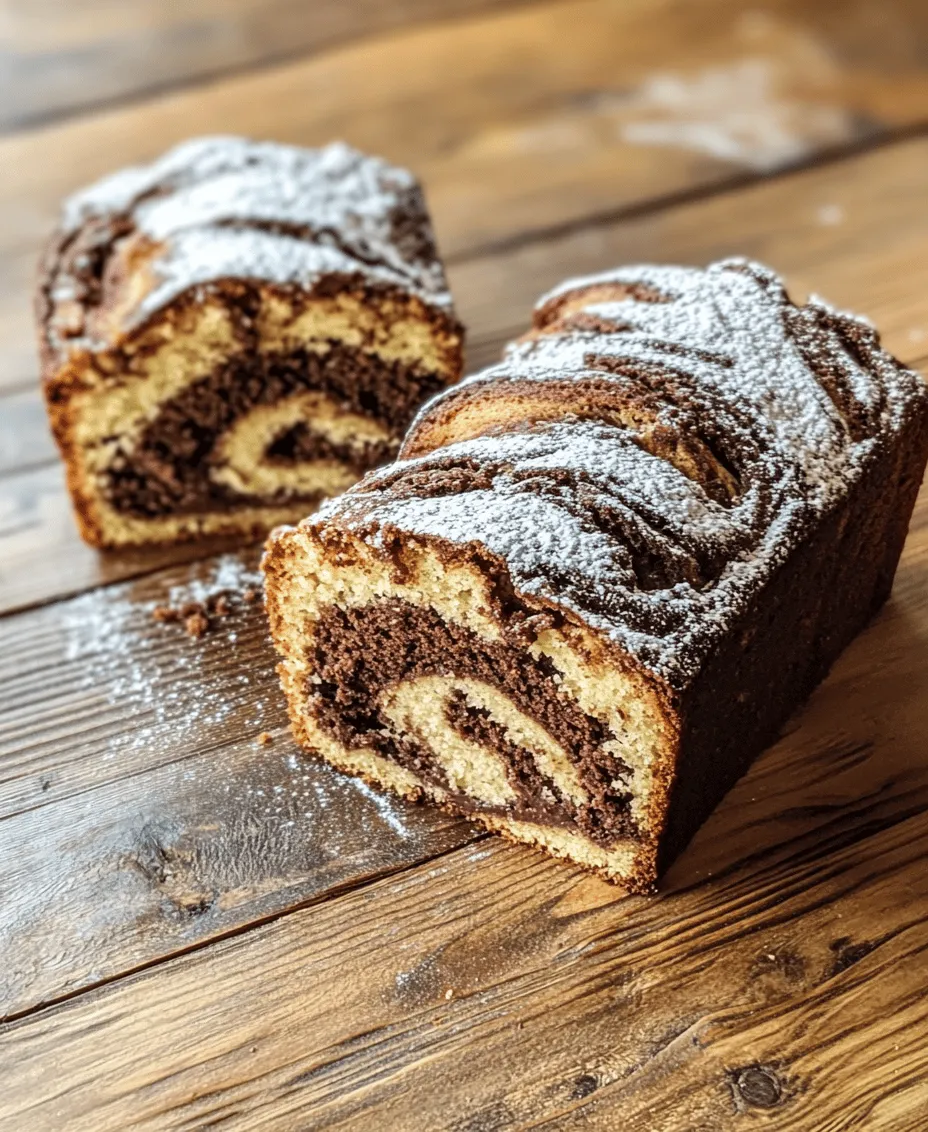
The beauty of the Swirled Delight Marble Loaf Cake lies in its stunning marbled effect, achieved by skillfully blending two distinct batters—one luscious chocolate and the other creamy vanilla. The result is a cake that not only pleases the palate but also dazzles the eyes, making it a favorite among bakers and dessert enthusiasts alike. Imagine slicing into this loaf and revealing the intricate swirls, each bite a delightful surprise of flavor and texture.
What makes this cake truly special is its moist crumb, which is a result of carefully selected ingredients and precise baking techniques. The interplay of vanilla and chocolate creates a harmonious blend that is both comforting and sophisticated, appealing to a wide range of taste preferences. Whether you’re baking for family, friends, or simply indulging yourself, this cake promises to impress and satisfy.
Understanding the Ingredients
To master the Swirled Delight Marble Loaf Cake, it’s essential to understand the role of each ingredient. Each component contributes uniquely to the cake’s texture, flavor, and overall success. Let’s explore these key ingredients and their significance in the baking process.
All-Purpose Flour
All-purpose flour serves as the backbone of our loaf cake. Its moderate protein content provides the structure necessary for the cake to rise and hold its shape. When mixed with liquid, the proteins in the flour form gluten, which contributes to the cake’s texture. For the Swirled Delight Marble Loaf Cake, using high-quality all-purpose flour ensures a tender yet firm crumb, allowing the cake to maintain its integrity while being moist and flavorful.
Baking Powder and Baking Soda
The leavening agents, baking powder and baking soda, are crucial for achieving the light and fluffy texture characteristic of a well-made cake. Baking powder is a double-acting leavening agent that releases carbon dioxide gas when mixed with liquid and again when exposed to heat. This dual-action creates the necessary lift for our loaf cake. Baking soda, on the other hand, requires an acidic component to activate, which in this recipe is provided by the buttermilk. Together, these agents ensure that our cake rises beautifully, resulting in a soft, airy crumb.
Unsalted Butter and Sugar
Butter is a vital ingredient that adds richness and depth of flavor to the cake. In the creaming process, butter is beaten with sugar to incorporate air into the mixture, creating a light and fluffy texture. Using unsalted butter allows for better control over the overall saltiness of the cake, as we can adjust salt levels to taste. Sugar not only sweetens the cake but also contributes to a tender crumb by interfering with gluten formation. This combination of butter and sugar sets the foundation for a moist and flavorful loaf.
Eggs and Vanilla Extract
Eggs play a multifaceted role in baking; they bind the ingredients together, provide moisture, and contribute to the structure of the cake. The proteins in eggs coagulate during baking, helping to stabilize the cake’s structure. Additionally, vanilla extract enhances the cake’s flavor profile, infusing it with warm, aromatic notes. The combination of eggs and vanilla creates a rich base for the batter, elevating the overall taste experience.
Buttermilk
Buttermilk is a secret weapon in the baking world, known for its ability to create moist cakes with a tender crumb. The acidity in buttermilk reacts with the baking soda, adding lift and creating a light texture. Furthermore, it helps to enhance the flavor of the cake, providing a subtle tanginess that balances the sweetness. Using buttermilk in our Swirled Delight Marble Loaf Cake ensures that every slice is rich, moist, and bursting with flavor.
Cocoa Powder
Cocoa powder is the ingredient that brings the chocolate component to our marble loaf cake. It not only adds a deep, rich flavor but also contributes to the cake’s beautiful color. When combined with the vanilla batter, cocoa powder creates a striking contrast, enhancing the visual appeal of the marbled effect. Using high-quality unsweetened cocoa powder will ensure a bold chocolate flavor that perfectly complements the sweetness of the vanilla batter.
Preparing the Cake
Now that we’ve explored the essential ingredients, let’s delve into the step-by-step guide to preparing the Swirled Delight Marble Loaf Cake. This process is straightforward and rewarding, allowing you to create a stunning dessert that will impress anyone who has the pleasure of tasting it.
Prepping the Oven and Pan
Before we begin mixing our ingredients, it’s crucial to prepare the oven and loaf pan to ensure even baking. Preheat your oven to 350°F (175°C). This ensures that the cake bakes evenly from the moment it goes in. While the oven is heating, take a standard 9×5-inch loaf pan and grease it with butter or non-stick spray, then line the bottom with parchment paper. This will help prevent the cake from sticking and make it easier to remove once baked.
Mixing the Dry Ingredients
In a medium mixing bowl, whisk together the all-purpose flour, baking powder, baking soda, and salt. This step is vital as it ensures that the leavening agents are evenly distributed throughout the flour. Properly mixing the dry ingredients helps prevent any clumps and ensures that the cake rises uniformly. Set this bowl aside while you prepare the wet ingredients.
Creaming Butter and Sugar
In a large mixing bowl, use an electric mixer to cream together the unsalted butter and granulated sugar. Beat the mixture on medium speed for about 3-5 minutes until it becomes light and fluffy. This process is essential as it incorporates air into the batter, which will contribute to the cake’s light texture. Scrape down the sides of the bowl as needed to ensure all the butter and sugar are well combined.
Incorporating Eggs and Vanilla
Once the butter and sugar are creamed, it’s time to add the eggs and vanilla extract. Add the eggs one at a time, mixing well after each addition to ensure thorough incorporation. This gradual process helps to emulsify the mixture properly. After all the eggs are added, pour in the vanilla extract and mix until just combined. The batter should now be rich and creamy, with a delicious aroma wafting through your kitchen.
Combining Dry Ingredients with Buttermilk
Next, we will alternate adding the dry ingredients and buttermilk to the creamed mixture. Begin by adding about one-third of the dry mixture to the batter, mixing on low speed until just combined. Then, pour in half of the buttermilk, mixing gently until incorporated. Continue this process, adding another third of the dry ingredients, followed by the remaining buttermilk, and finishing with the last of the dry mixture. Be careful not to overmix; a few lumps are perfectly fine. This method helps to create a smooth, cohesive batter while maintaining the cake’s lightness.
Creating the Chocolate Swirl
Now comes the fun part—creating the chocolate swirl! In a separate bowl, combine a portion of the batter with unsweetened cocoa powder to create the chocolate batter. Start by scooping out about one cup of the vanilla batter and mixing it with the cocoa powder until well combined. This chocolate batter will be gently folded into the vanilla batter to create that stunning marbled effect.
To create the swirl, pour half of the vanilla batter into the prepared loaf pan, followed by dollops of the chocolate batter. Use a knife or a skewer to swirl the two batters together gently. Be careful not to overmix; the goal is to create a beautiful marbled appearance. Repeat the process with the remaining batters, ensuring that the top is level before placing the pan in the preheated oven.
This cake is not only a treat for the taste buds but also a feast for the eyes, making it a perfect centerpiece for any gathering.
Stay tuned for the next part of this delicious journey as we explore the baking process, cooling, and serving suggestions for the Swirled Delight Marble Loaf Cake.
Swirling Technique
Creating the marbled effect in your Swirled Delight Marble Loaf Cake is essential for achieving that stunning visual appeal and delightful flavor combination. The key to a successful swirl is maintaining the distinct layers of chocolate and vanilla batter while allowing them to mingle just enough to create a beautiful marbling.
To achieve this, begin by layering spoonfuls of vanilla batter and chocolate batter alternately into the prepared loaf pan. Start with a dollop of vanilla batter, followed by a dollop of chocolate batter, and continue this pattern until both batters are used. Once you have filled the pan, take a knife or a skewer and gently swirl through the batters. Use a gentle hand to avoid overmixing, which would result in a muddy appearance instead of distinct swirls. Aim for a figure-eight motion or a simple up-and-down motion to create an attractive marbled design. The goal is to see the contrasting colors without losing their individual identities.
Baking the Cake
Baking is where the magic happens, transforming your carefully prepared batter into a delicious loaf cake. To ensure that your Swirled Delight Marble Loaf Cake is perfectly baked, preheat your oven to the recommended temperature of 350°F (175°C). Before placing your cake in the oven, make sure to place the loaf pan in the center of the oven for even heat distribution.
During baking, it’s important to keep an eye on the cake. The smell of the cake as it bakes will be heavenly, filling your kitchen with the warm aroma of vanilla and chocolate. Start checking for doneness at the 50-minute mark, although baking times can vary depending on your oven. The cake is done when a toothpick inserted into the center comes out clean or with just a few moist crumbs attached. If you notice that the top is browning too quickly, you can loosely cover it with aluminum foil to prevent burning while allowing the inside to continue cooking.
Baking Time and Temperature
The ideal baking conditions for your Swirled Delight Marble Loaf Cake involve a steady temperature of 350°F (175°C) and a baking time of approximately 50 to 60 minutes. However, ovens can vary in temperature, so it’s crucial to monitor your cake closely. After the initial 50 minutes, begin checking for doneness. Insert a toothpick or cake tester into the thickest part of the loaf – if it comes out clean or with just a few moist crumbs clinging to it, your cake is ready.
If the toothpick comes out with wet batter, it’s a sign that the cake needs more time. Continue baking, checking at 5-minute intervals until it’s fully cooked. Overbaking can lead to a dry cake, so vigilance is key during this final phase of baking.
Cooling the Cake
Once you’ve removed the cake from the oven, it’s crucial to let it cool properly to maintain its texture and flavor. Allow the cake to sit in the loaf pan for about 10-15 minutes. This resting period helps the cake firm up and makes it easier to remove from the pan without falling apart. After the initial cooling, gently run a knife around the edges of the cake to loosen it from the sides. Carefully invert the pan and let the cake cool completely on a wire rack.
Cooling the cake completely is essential to achieving the best flavor and texture. If you slice into the cake while it’s still warm, you may find that it is too soft and crumbly, leading to an unsatisfactory presentation. Allowing it to cool will result in a firm, sliceable loaf that holds its shape beautifully.
Serving Suggestions
When it comes to serving your Swirled Delight Marble Loaf Cake, there are countless ways to enhance its presentation and enjoyment. You might consider slicing the cake into thick, generous slices and arranging them on a beautiful serving platter. For an elegant touch, garnish each slice with fresh berries, such as raspberries or strawberries, which contrast nicely with the cake’s flavors.
Another delightful way to serve the cake is to pair it with a scoop of vanilla or chocolate ice cream. The warmth of the cake paired with the cold ice cream creates a delightful contrast that is sure to impress your guests.
Dusting with Powdered Sugar
For an aesthetic appeal that is as pleasing to the eye as it is to the palate, consider dusting the top of your cooled Swirled Delight Marble Loaf Cake with powdered sugar. This simple step adds a touch of elegance and a hint of sweetness without overpowering the flavors of the cake. Using a fine mesh sieve, lightly sprinkle powdered sugar over the top of the cake just before serving. This not only enhances the visual appeal but also adds a slightly sweet finish that complements the rich chocolate and vanilla flavors beautifully.
Pairing with Beverages
When serving your Swirled Delight Marble Loaf Cake, the right beverage pairings can elevate the experience. A classic choice is a hot cup of coffee or espresso, which complements the cake’s flavors perfectly. The bitterness of coffee balances the sweetness of the cake, creating a harmonious tasting experience.
If you prefer tea, consider serving the cake with a robust black tea, such as Earl Grey or English Breakfast, which can stand up to the richness of the cake. For a lighter option, a refreshing herbal tea or a glass of cold milk can also be delightful accompaniments, especially for those who enjoy the classic combination of cake and milk.
Variations and Customizations
One of the joys of baking is the opportunity to explore creative variations and adaptations. Your Swirled Delight Marble Loaf Cake can easily be customized to suit your taste preferences or dietary needs. For instance, consider adding flavor variations by incorporating spices such as cinnamon or nutmeg into the vanilla batter for a warm, cozy flavor.
Another option is to replace some of the vanilla extract with almond extract, which adds a delightful nutty undertone that pairs beautifully with chocolate. You can also experiment with different chocolate types, such as dark chocolate or white chocolate, to create unique flavor combinations.
Flavor Additions
To personalize your Swirled Delight Marble Loaf Cake further, consider adding mix-ins to the batter. Chocolate chips, whether semi-sweet, dark, or white, can enhance the chocolate flavor and provide an enjoyable texture. Chopped nuts, such as walnuts or pecans, can also add a delightful crunch that complements the cake’s softness.
If you’re feeling adventurous, try folding in some shredded coconut or dried fruit, such as cranberries or cherries, for an unexpected twist that will surprise your taste buds.
Alternative Frosting Options
While the Swirled Delight Marble Loaf Cake is delicious on its own, adding a simple frosting or glaze can take it to the next level. A light chocolate ganache drizzled over the top can add a luxurious touch, while a classic vanilla buttercream can enhance the cake’s flavors. For a more refreshing option, a lemon glaze made with powdered sugar and lemon juice can brighten the cake and provide a lovely contrast to the rich chocolate and vanilla.
Storing the Cake
Proper storage is essential for maintaining the freshness and flavor of your Swirled Delight Marble Loaf Cake. If you plan to enjoy the cake within a few days, store it at room temperature. Simply wrap it tightly in plastic wrap or place it in an airtight container to prevent it from drying out.
For long-term storage, freezing the cake is an excellent option. To do this, ensure the cake is completely cooled, then wrap it tightly in plastic wrap and aluminum foil to protect it from freezer burn. The cake can be frozen for up to three months. When you’re ready to enjoy it, simply remove it from the freezer and allow it to thaw at room temperature for a few hours before serving.
Conclusion
Baking the Swirled Delight Marble Loaf Cake is not only a delightful culinary adventure but also a rewarding experience that brings joy to both the baker and those who enjoy the final product. With its ease of preparation, stunning presentation, and delightful flavors, this cake is a versatile dessert suitable for various occasions, from casual family gatherings to elegant celebrations.
The techniques shared, from the swirling method to the various serving suggestions, allow you to create a cake that is uniquely yours. Embrace the art of baking and experiment with variations, mix-ins, and pairings to make this beautiful cake your own. Whether you enjoy it plain, dusted with powdered sugar, or adorned with a luscious frosting, the Swirled Delight Marble Loaf Cake is sure to become a cherished favorite in your baking repertoire. So gather your ingredients, preheat your oven, and let the delicious baking journey begin!